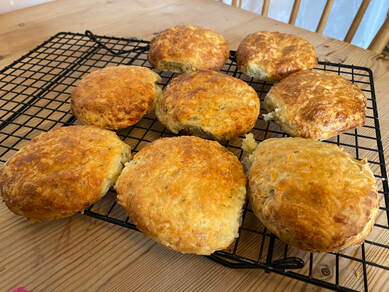
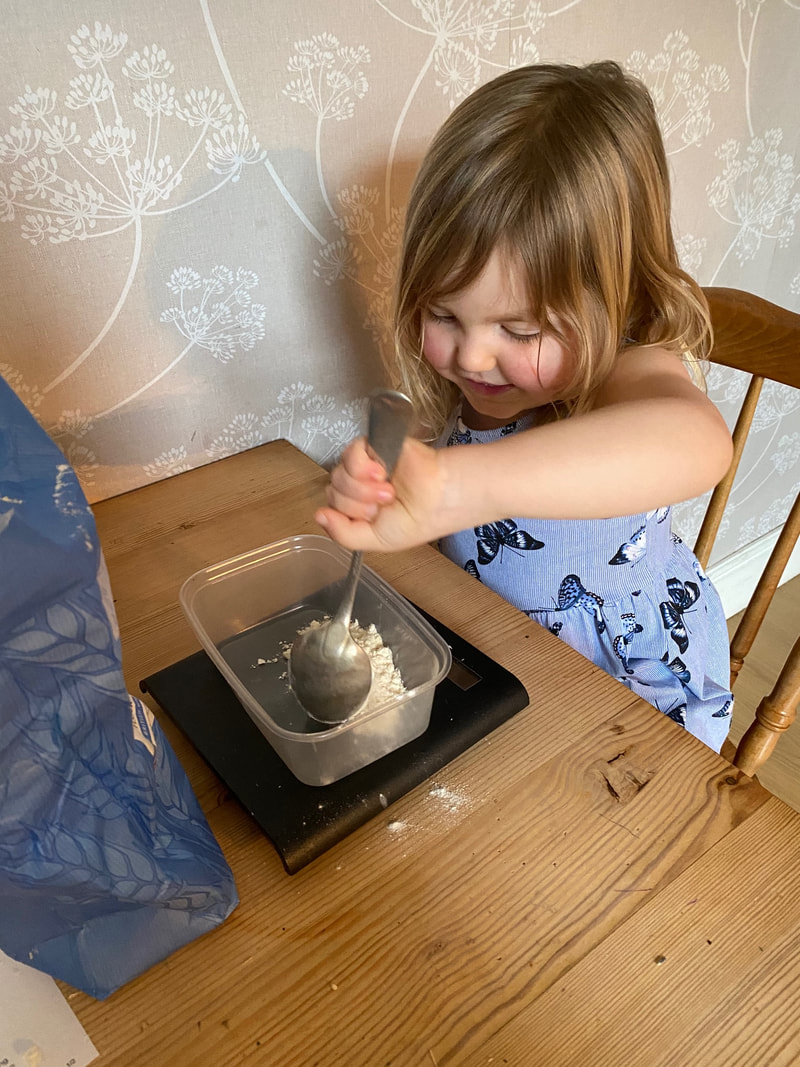
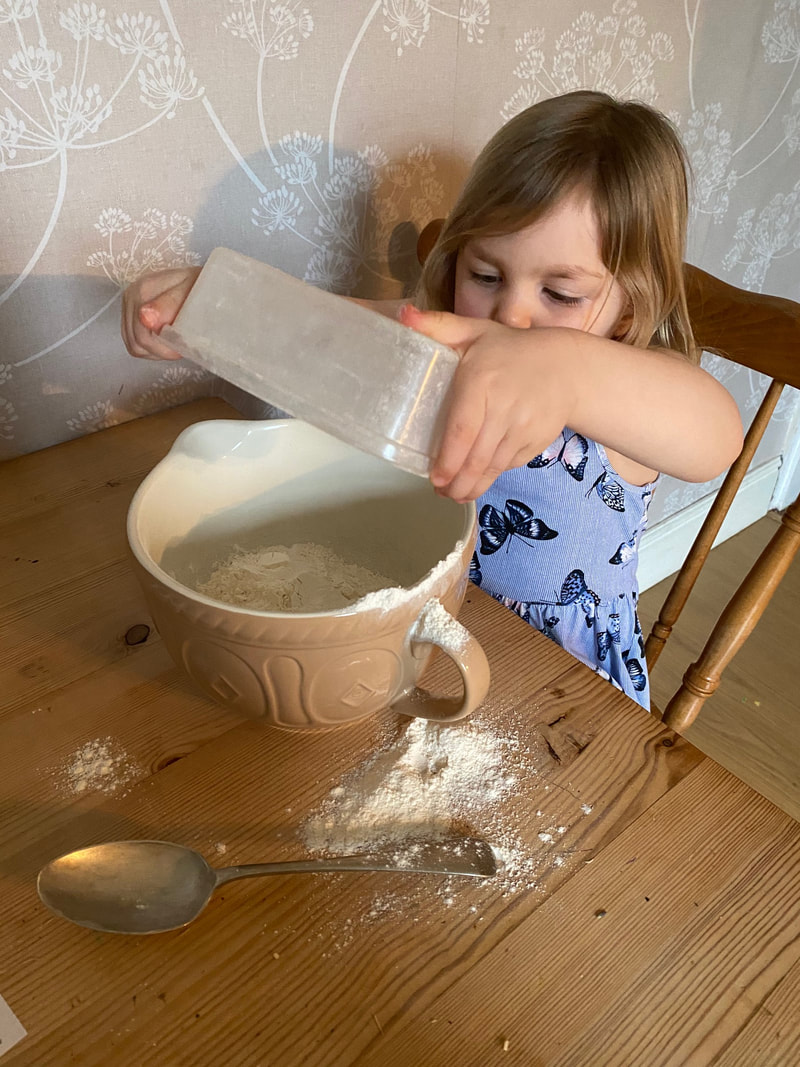
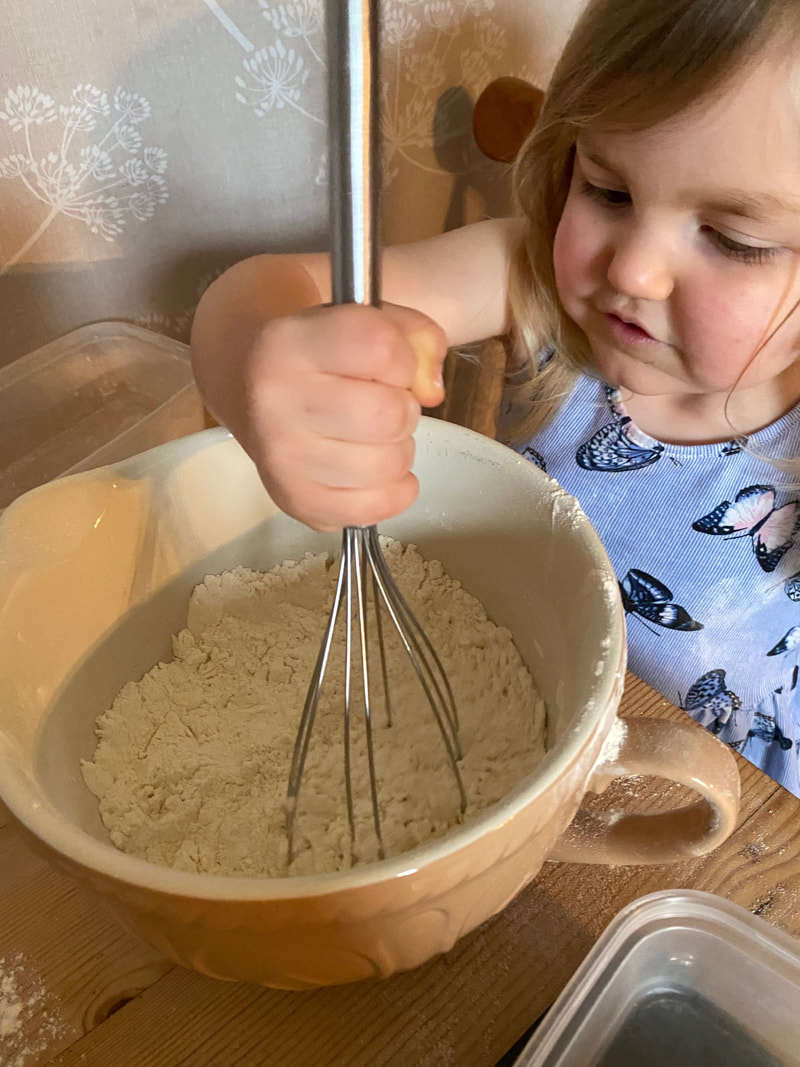
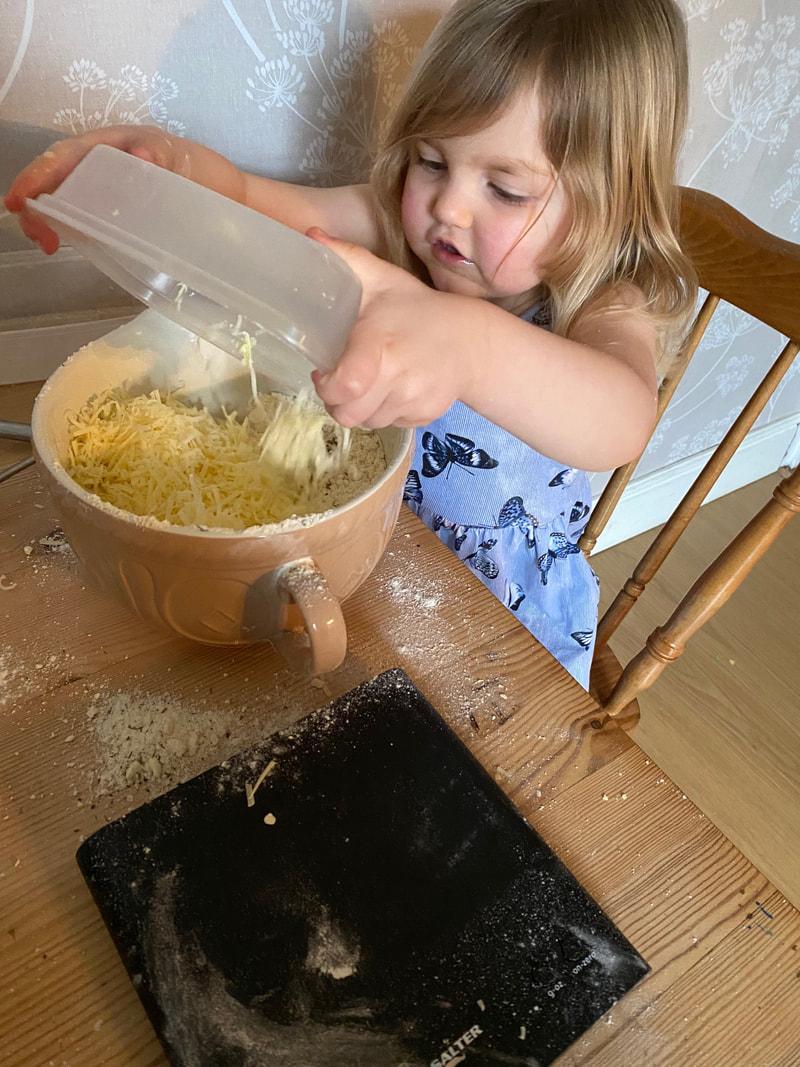
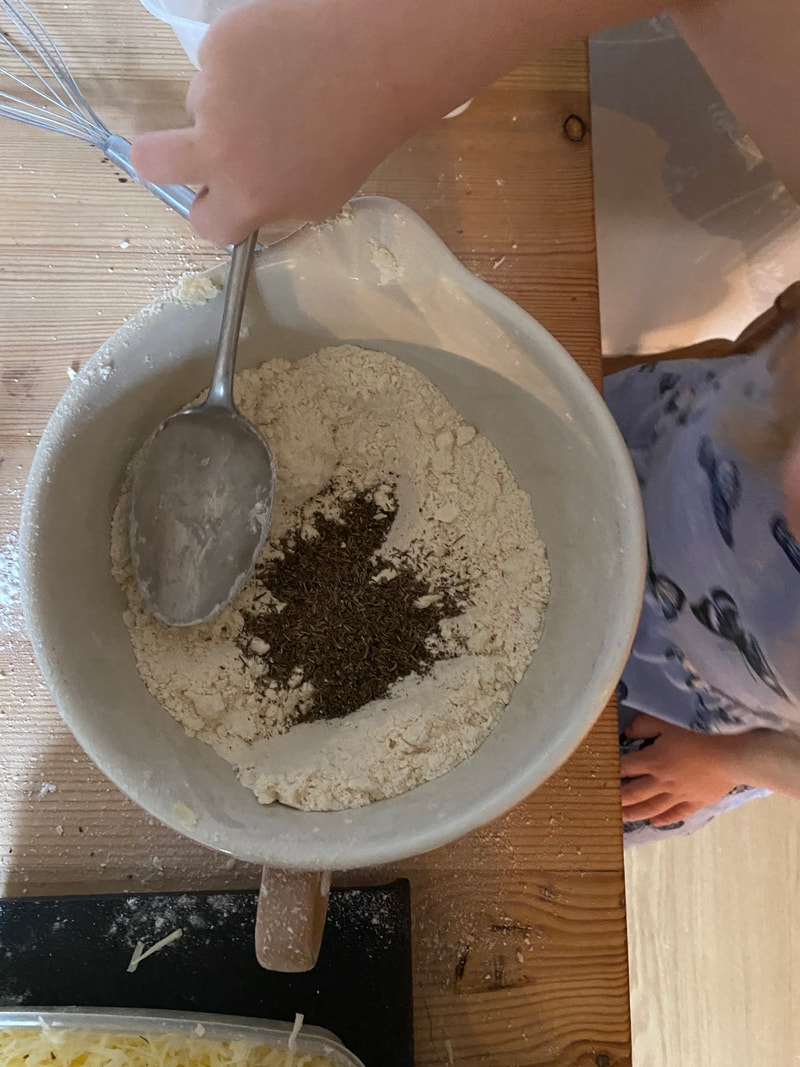
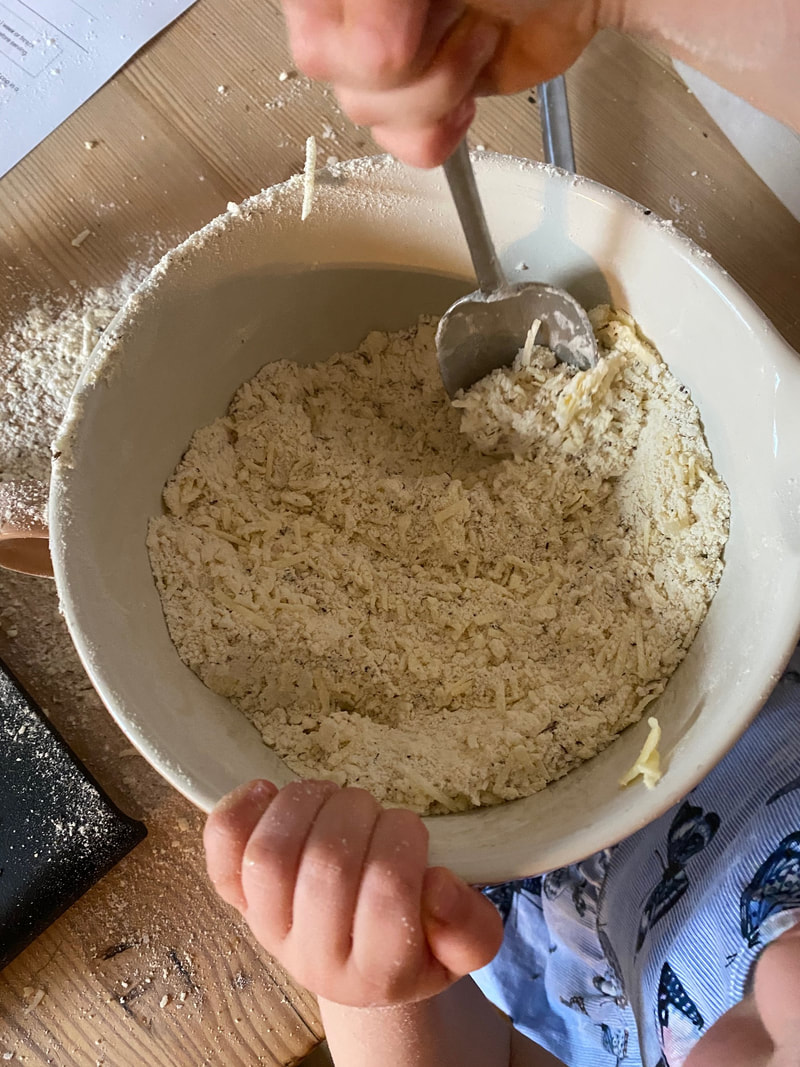
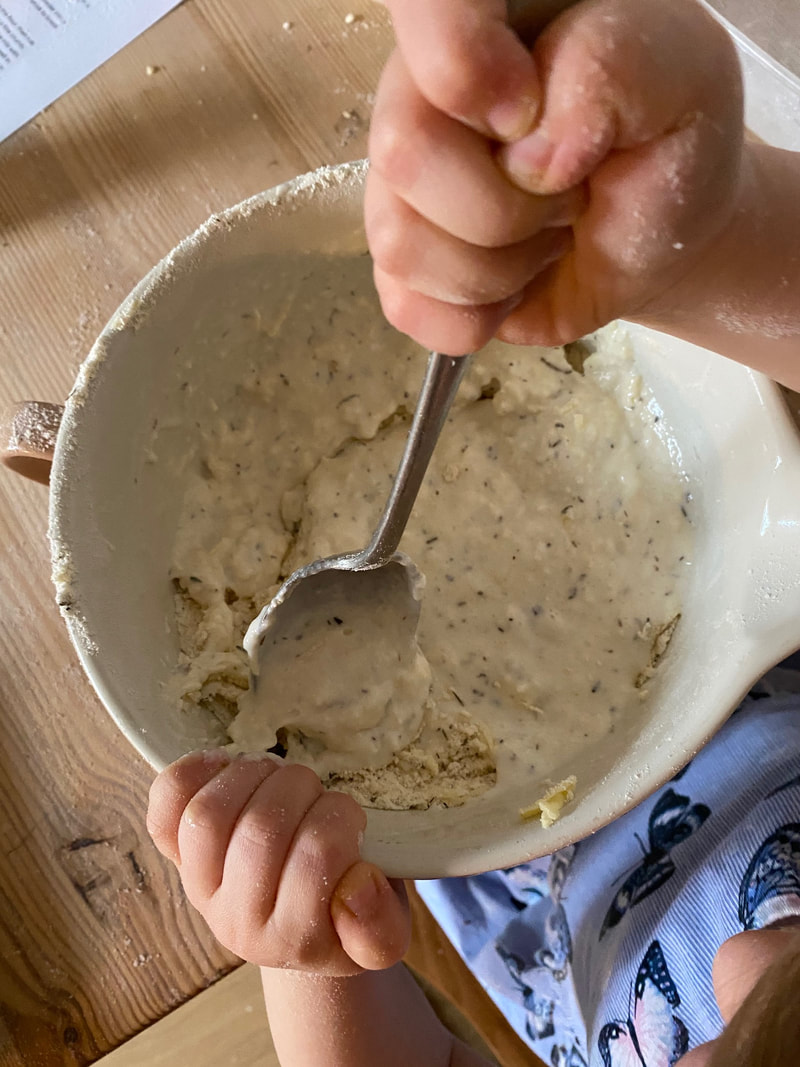
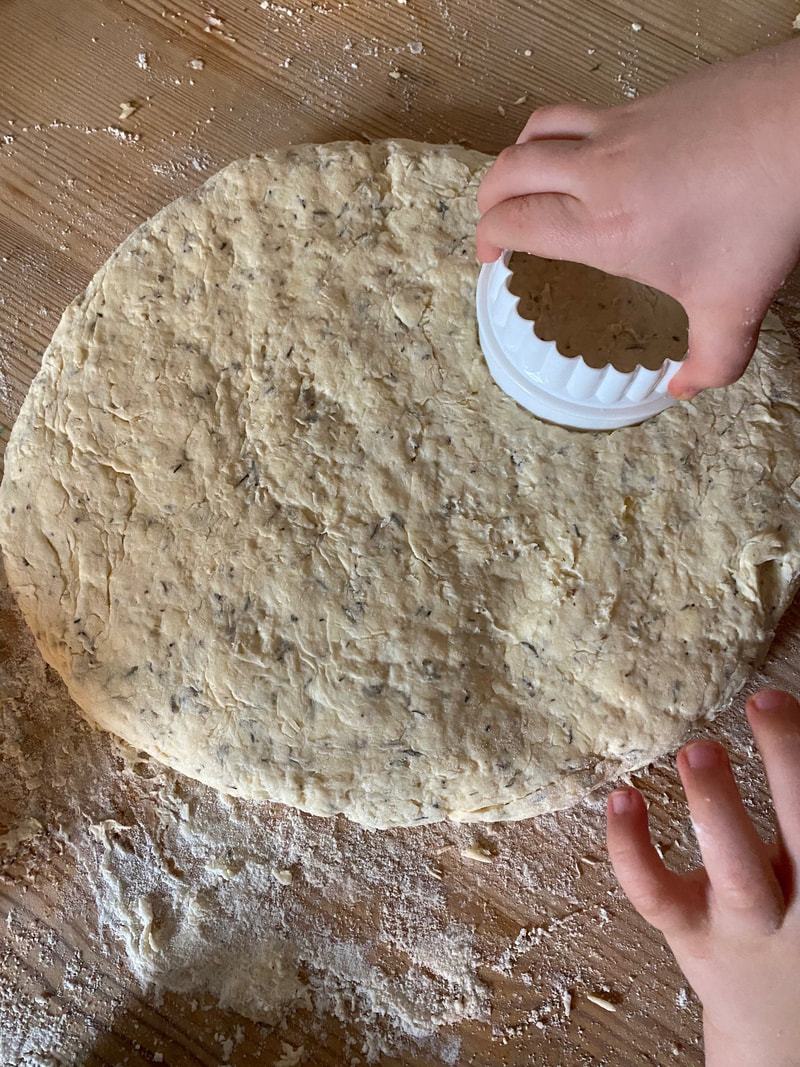
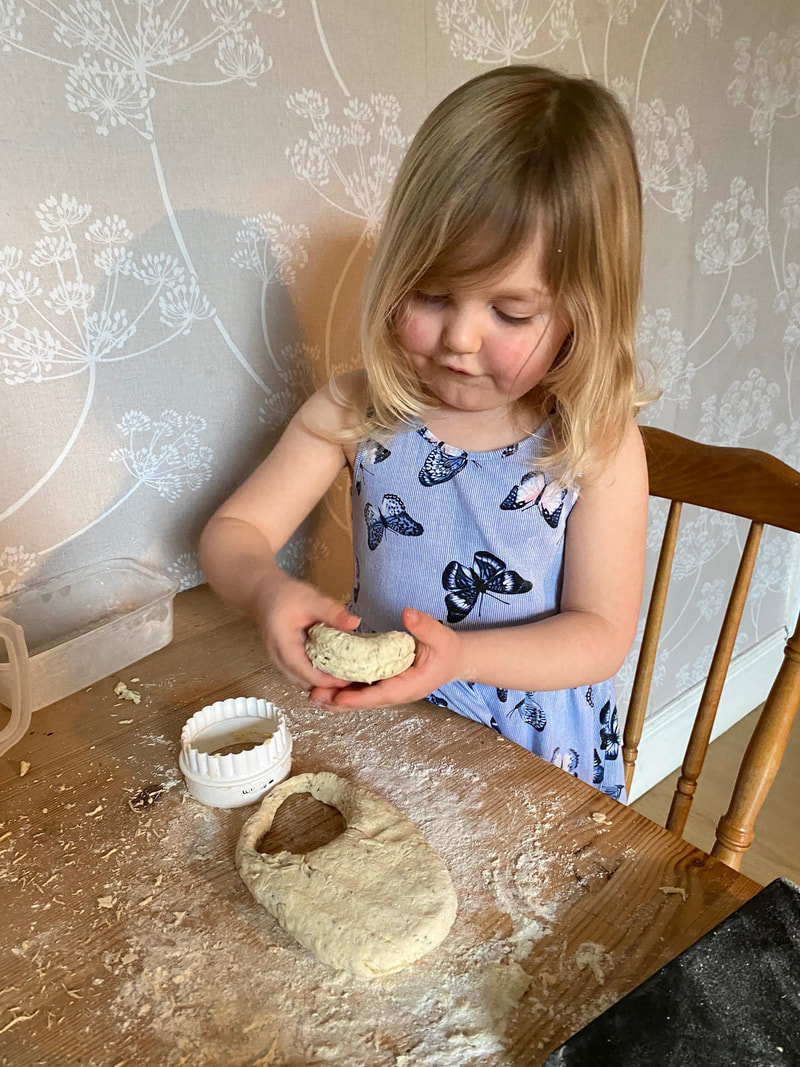
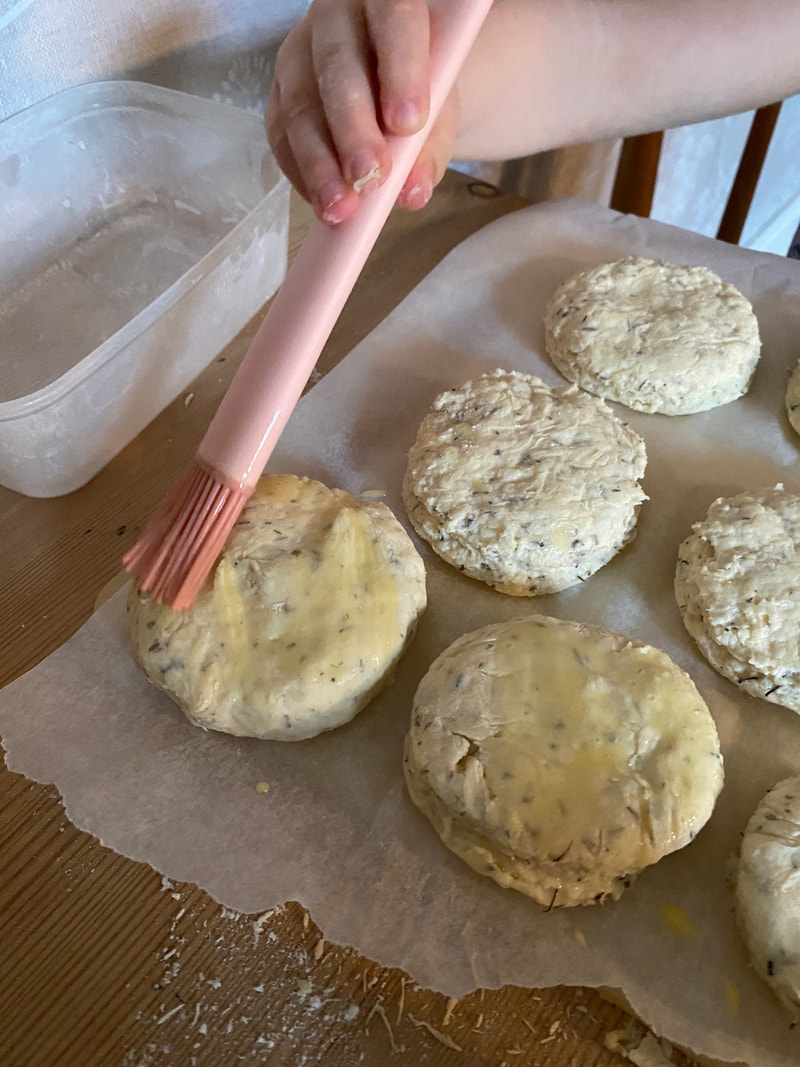
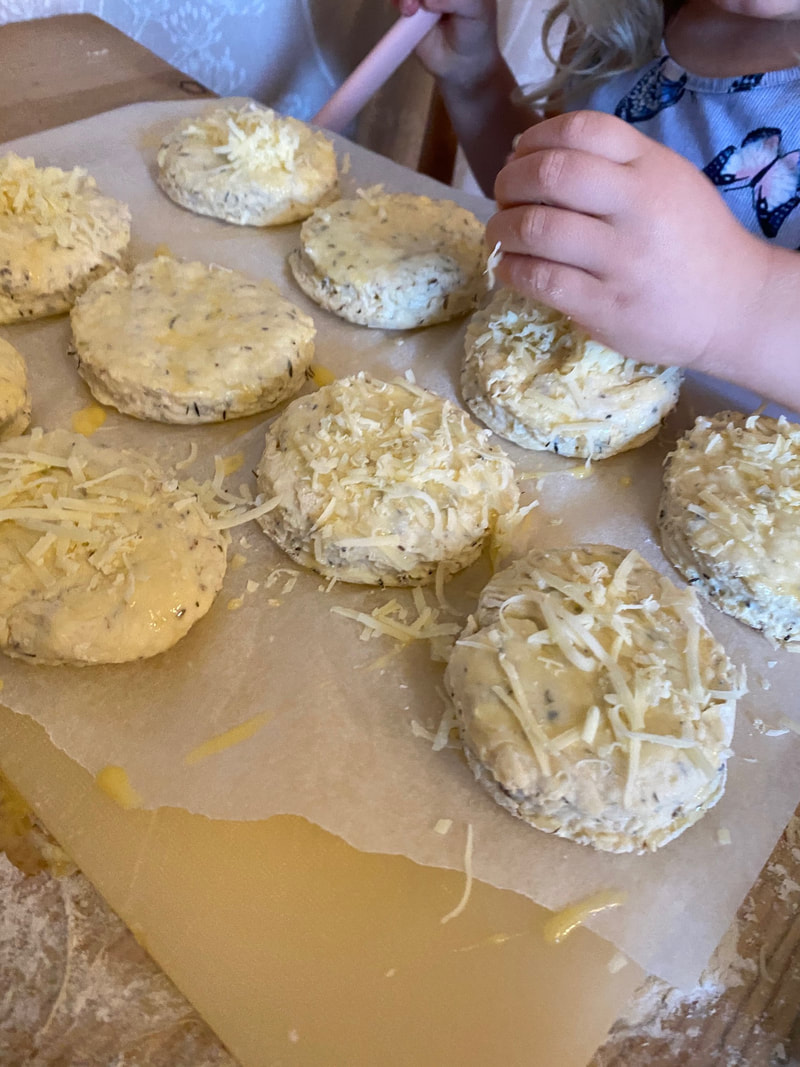
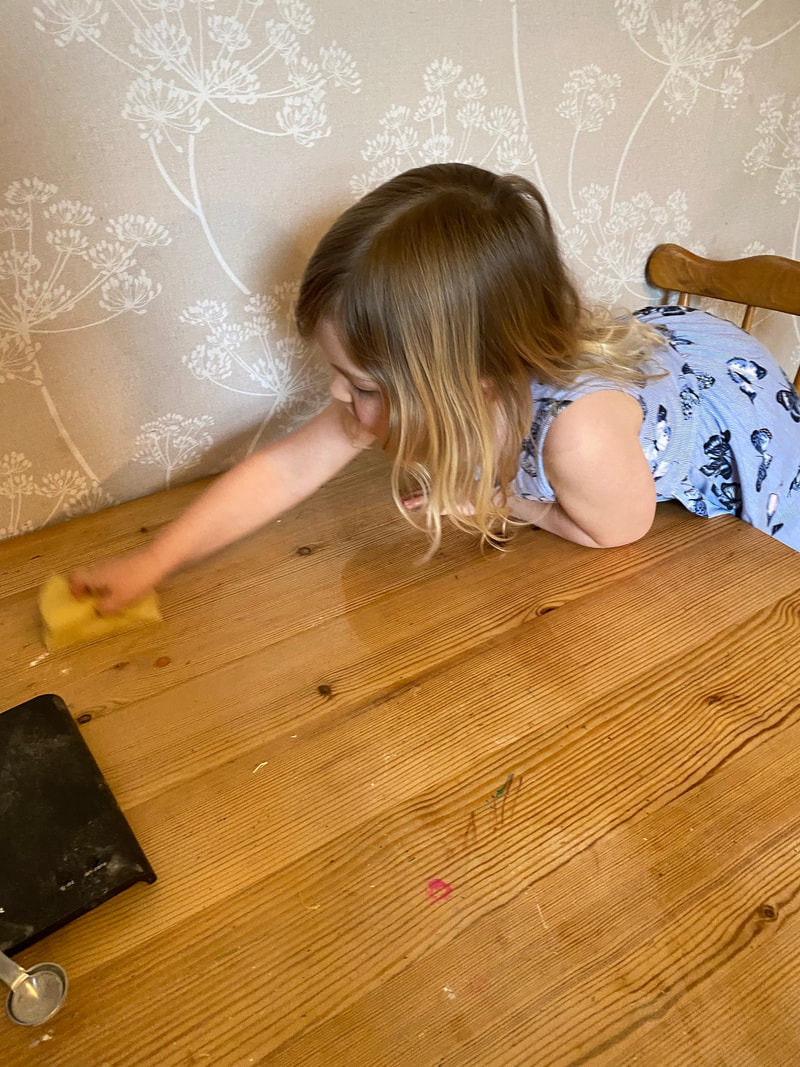
 First things first, you may have noticed that the scones in this picture look a little... well... pancake-like and flat... something went a bit wrong with the measuring of the buttermilk and the dough was super sticky! So we added lots of extra flour but probably should have added more baking powder too. But hey, that's how baking with kids goes sometimes! And they still tasted AMAZING. Who knows, maybe their amazingness was down to the extra buttermilk that kept them super soft and moist. The original recipe for these scones is one for cheese, chive and buttermilk scones from Sainsbury's magazine online (click here to see it)- I've just adapted it to use what we had in the cupboards. INGREDIENTS
*Substitutions:
Method Preheat the oven to 200c, fan 180c, gas 6 and pop in a large baking tray to heat up.
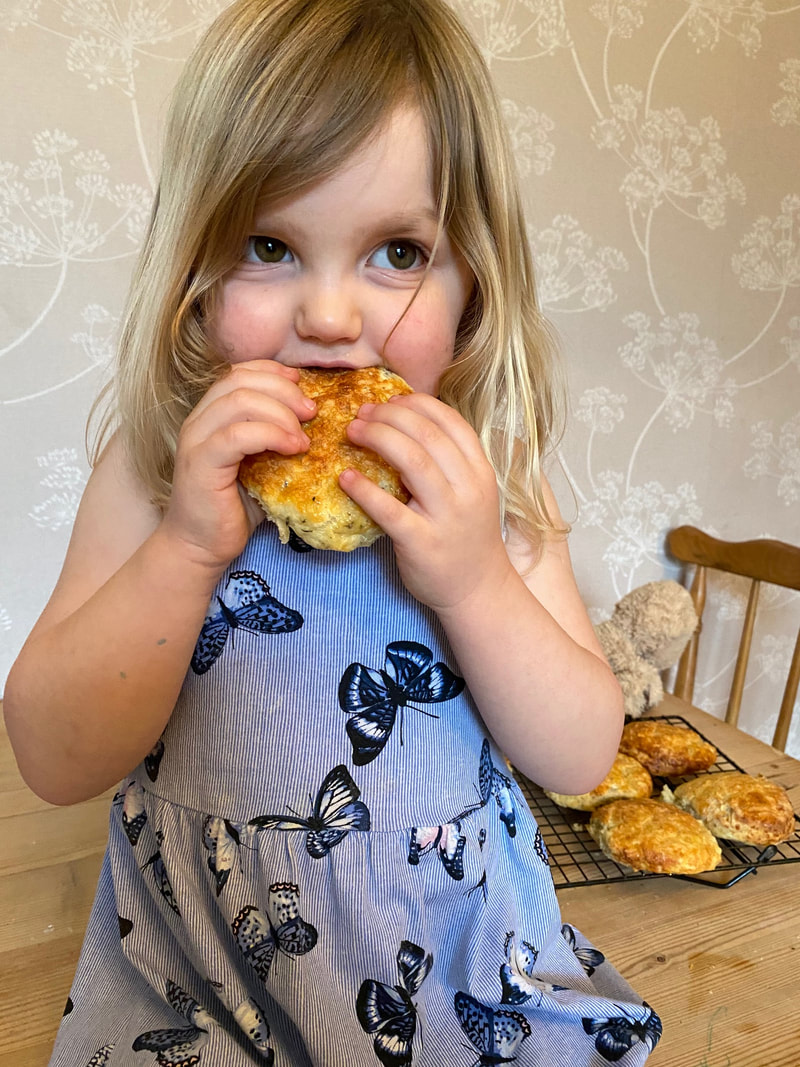
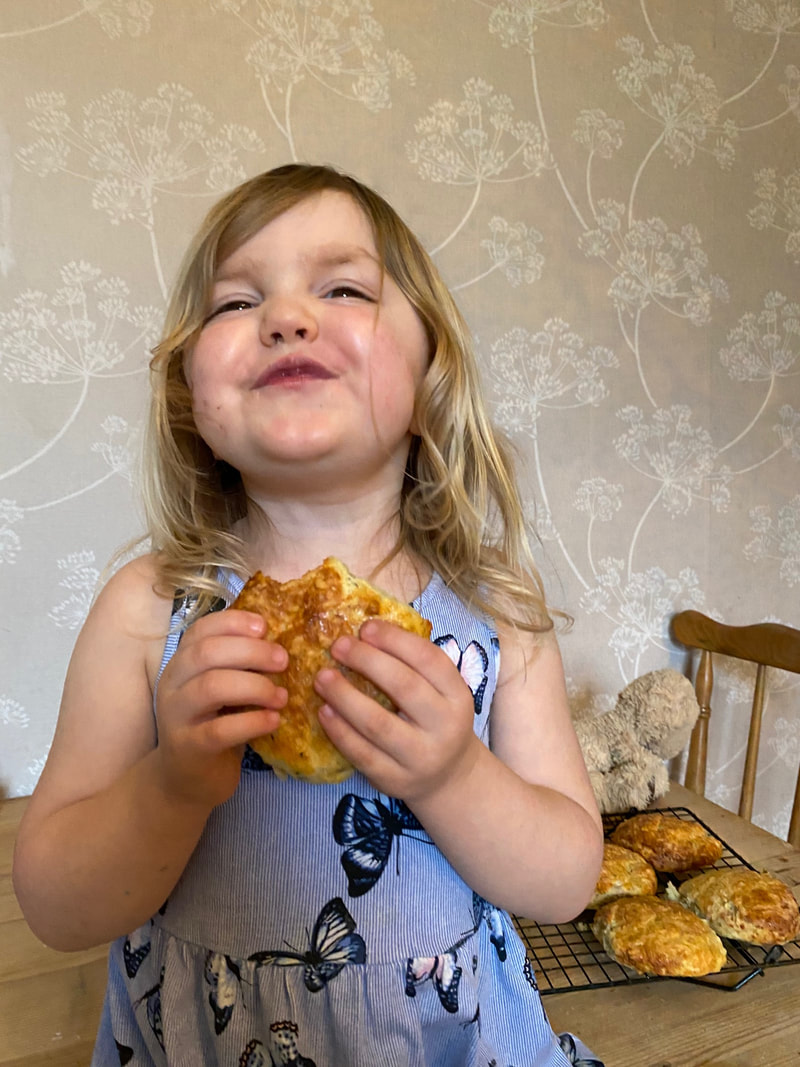
Enjoy your delicious scones! We have ours with a little butter while they're still warm. If you have enough left to save for another day, when you want to eat them, just pop them back in the oven for 5 minutes to refresh them beforehand.
0 Comments
This is one of those activities that some of you may well already do with the kids, but I thought it would be worth writing a quick post about it anyway in case you need a little inspiration for something to do when the weather is as crazy as it is right now! (Snow in April?! REALLY?!)
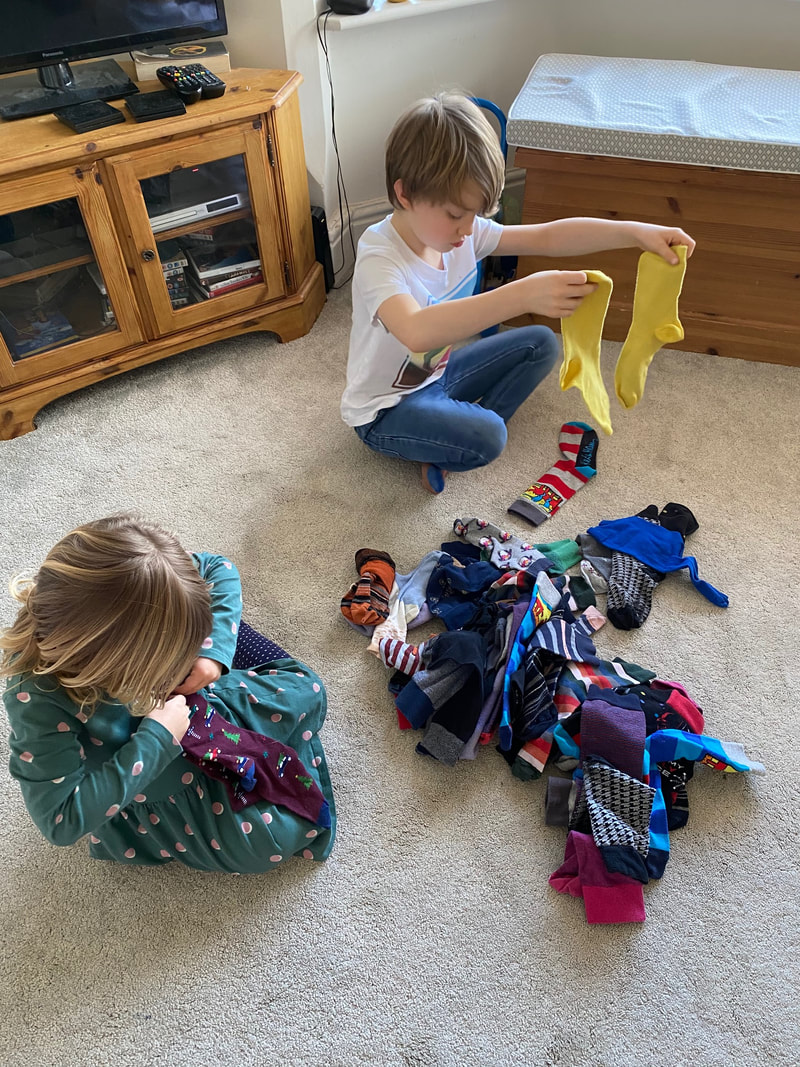
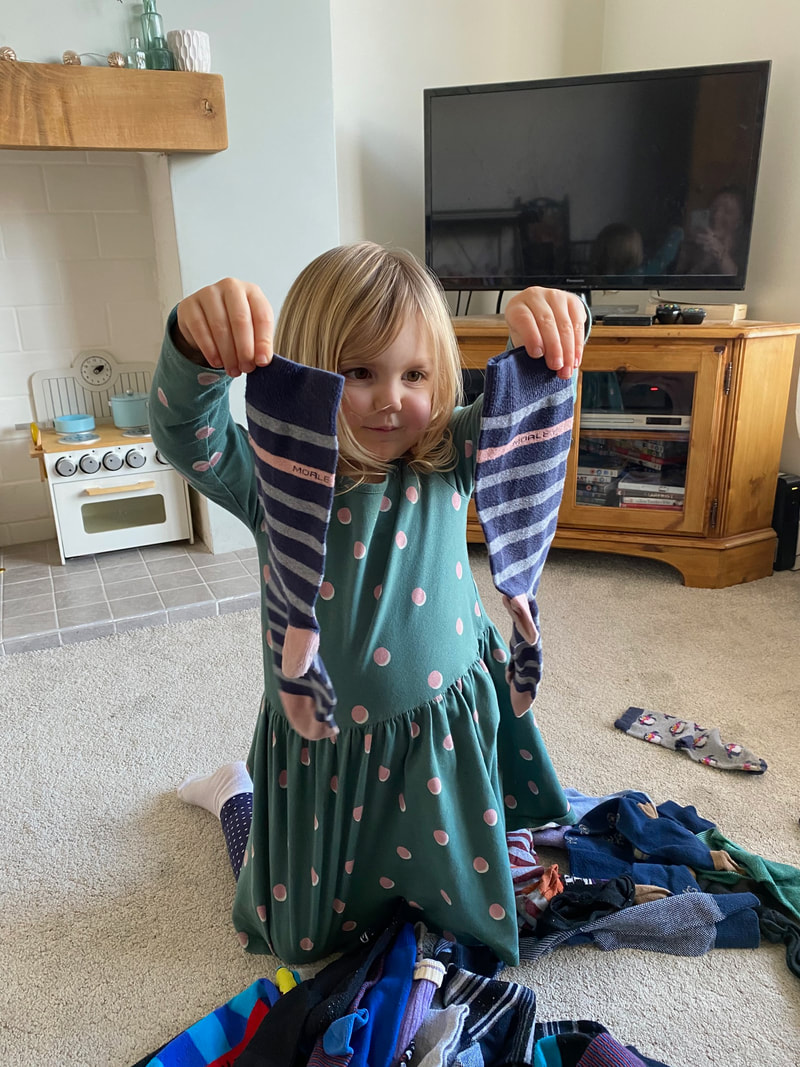
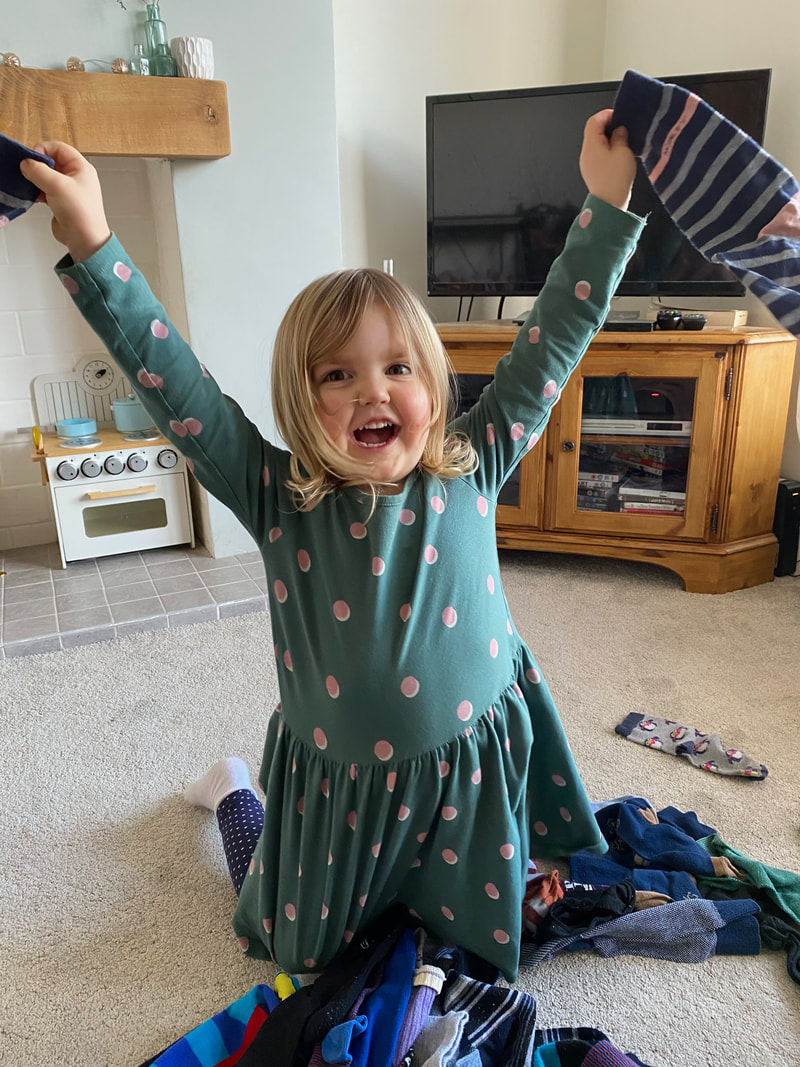
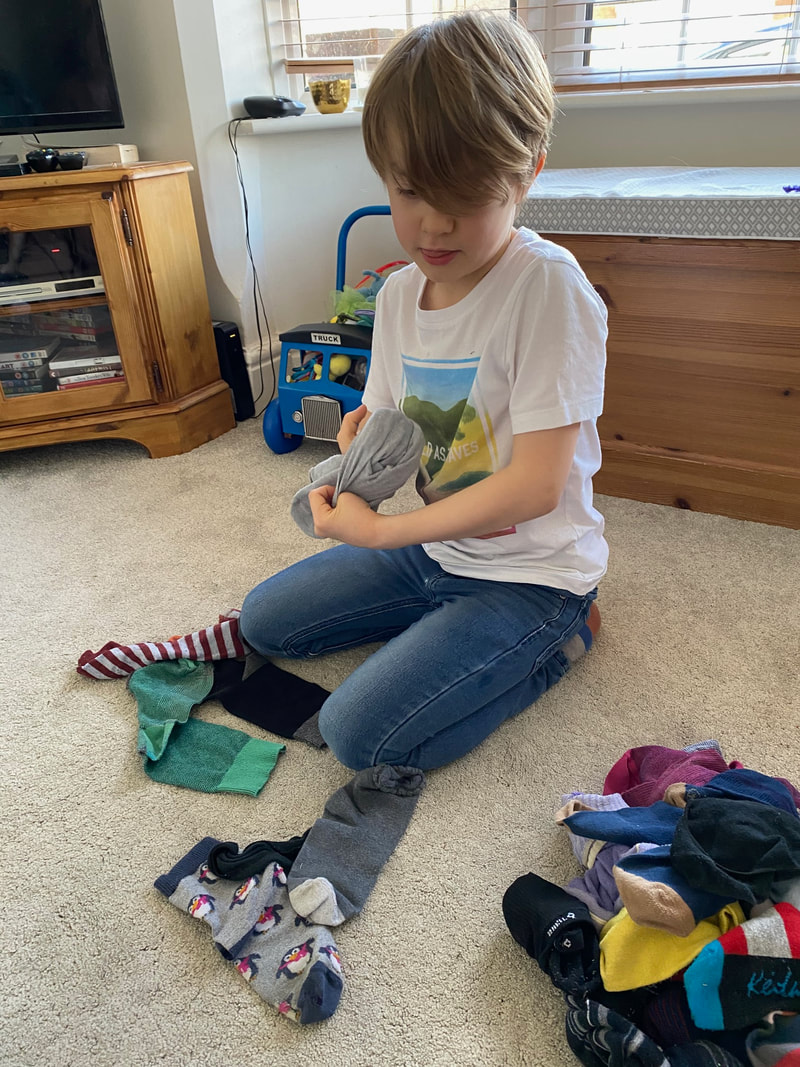
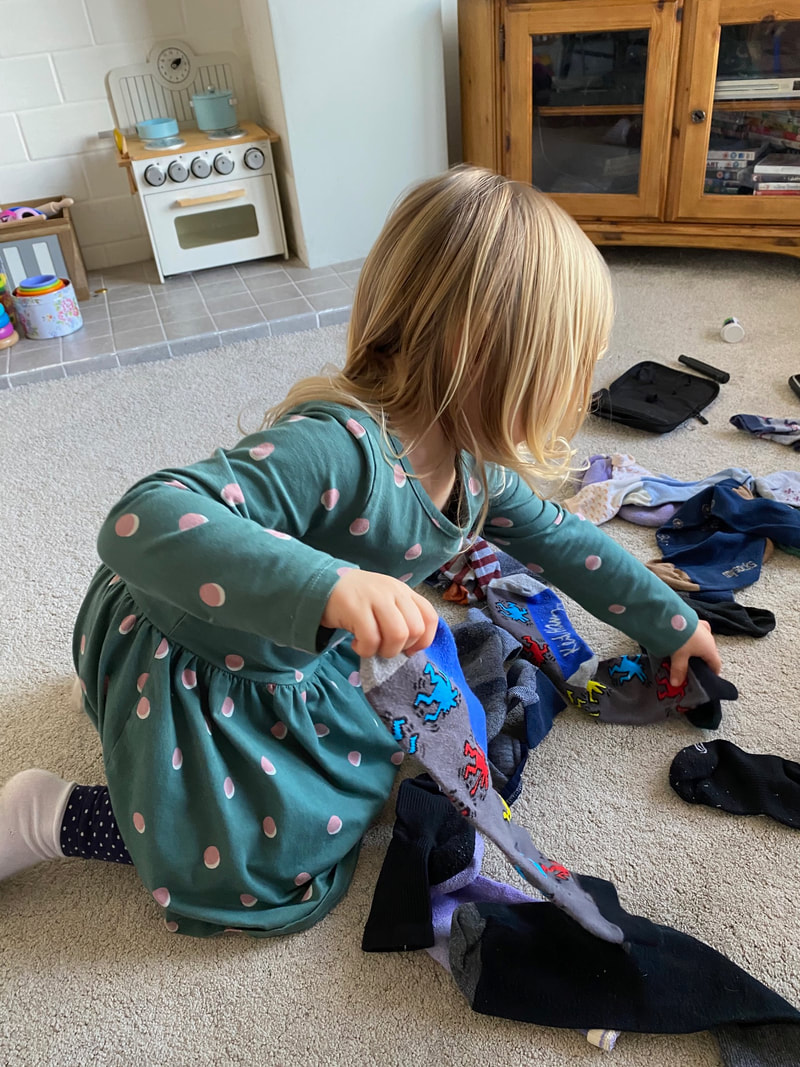
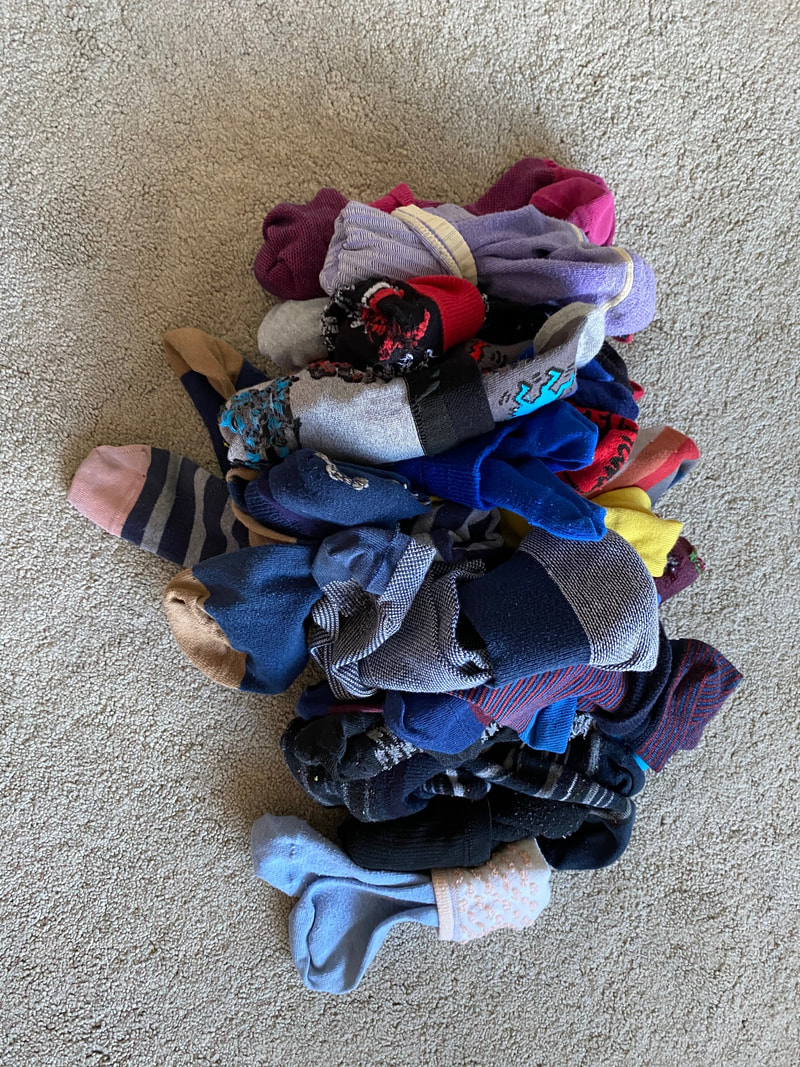
Laundry day. The day of the week where I long to be a kid again, back when using the washing machine wasn't one of my concerns. It does have it's upsides though- I do heaps and heaps of washing which means I don't have to worry about it (mostly) for another whole week. This also means that a LOT of socks need pairing, and it's something the kids can help with that can actually be quite (dare I say it...) fun!
Sophia hasn't got the hang of bundling the pairs up just yet, so I help with that part after she's found the two matching socks. Miles is good at bundling so does his own. He is also pretty competitive so it usually turns into a race to see who can make the most pairs. Of course he's always the winner but Sophia is usually pretty chuffed with her pile and isn't too fussed.
With younger children you can talk about the different colours and patterns, maybe ask them to find a sock of a specific colour etc. Hopefully by the end of it you'll have a big heap of paired socks and the kids will have been entertained while unknowingly helping with the housework! Hoorah!
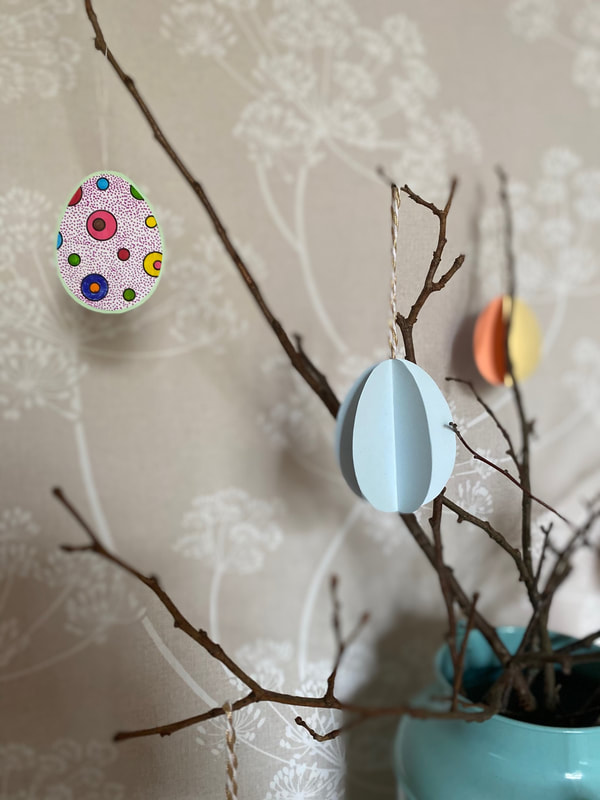
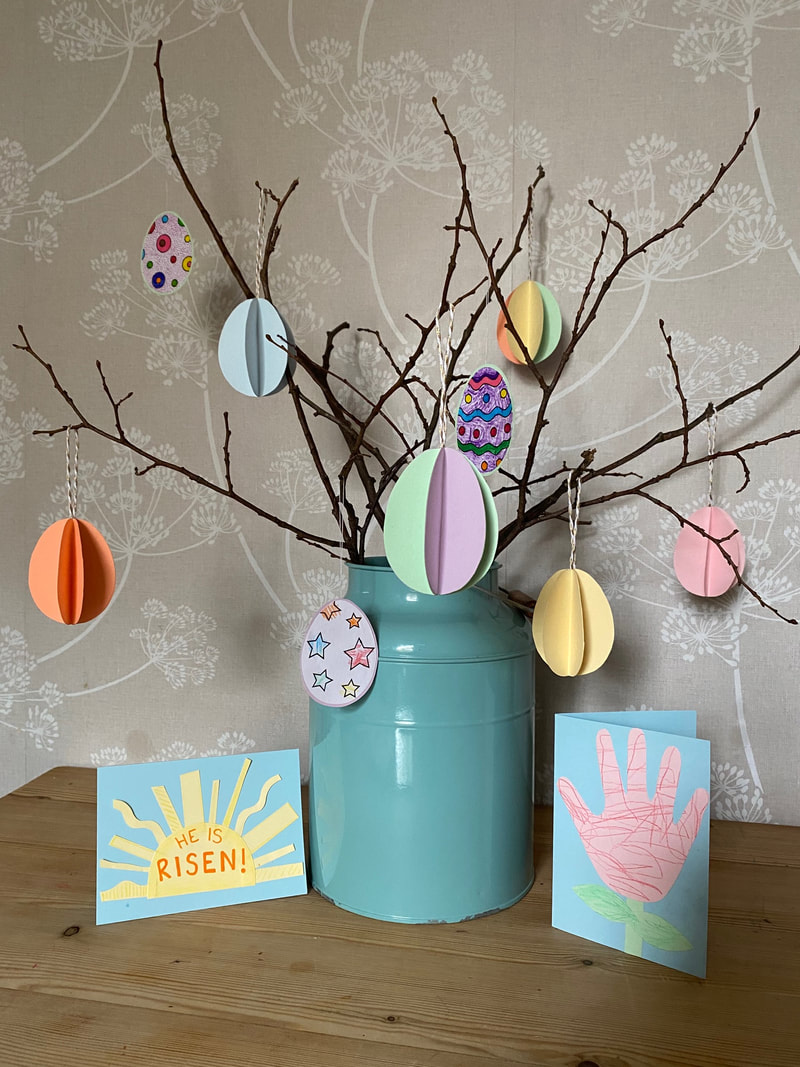 I hope you're all enjoying the Easter holidays so far, we've spent lots of time outside as the weather's just been so gorgeous! It's been much colder today though and looks like it won't warm up again until after the weekend, so now's the perfect time to get your craft on! All you need to make these gorgeous egg decorations is the leftover coloured card and cotton thread from your Easter card craft pack, along with the scissors and glue stick.
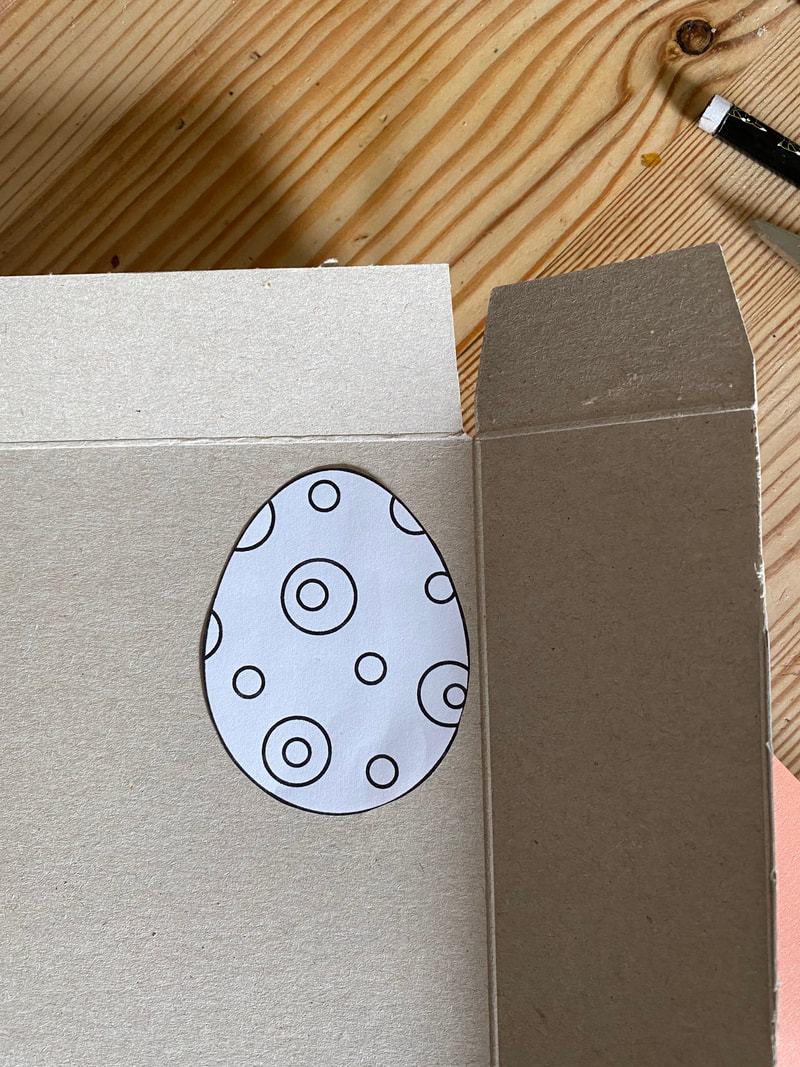
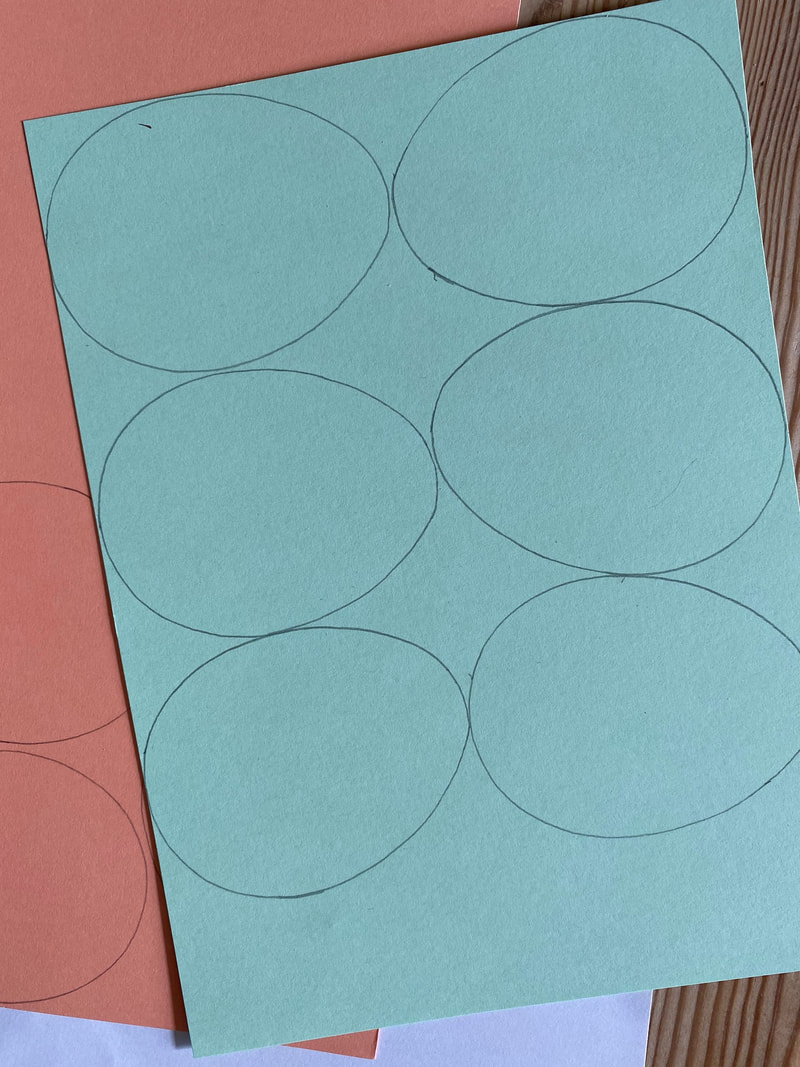
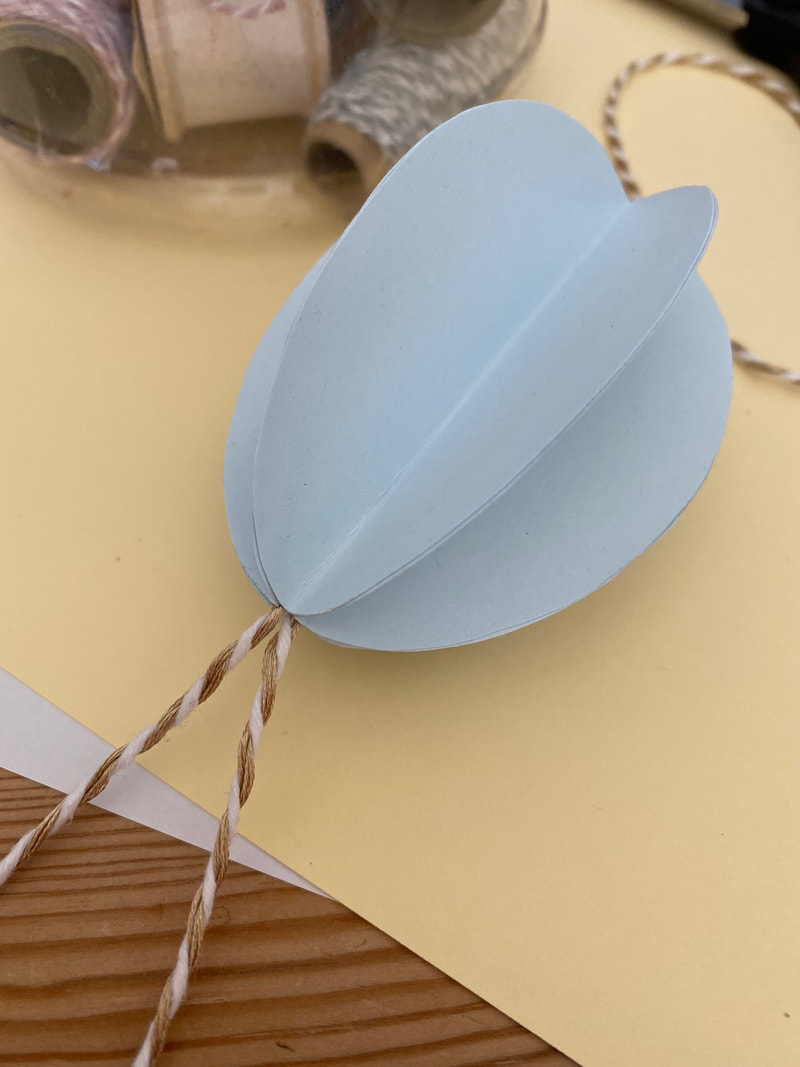
1. First things first, I used a small egg shape to make a template out of some card from a cereal box. This is optional but it definitely helps to make the next part quicker! Now draw out some egg shapes onto the coloured card. I used six egg shapes for most of my decorations, but four works too, especially if you let the kids draw some designs on them before you start sticking them together. I also made one decoration with 8 egg shapes which looks really nice.
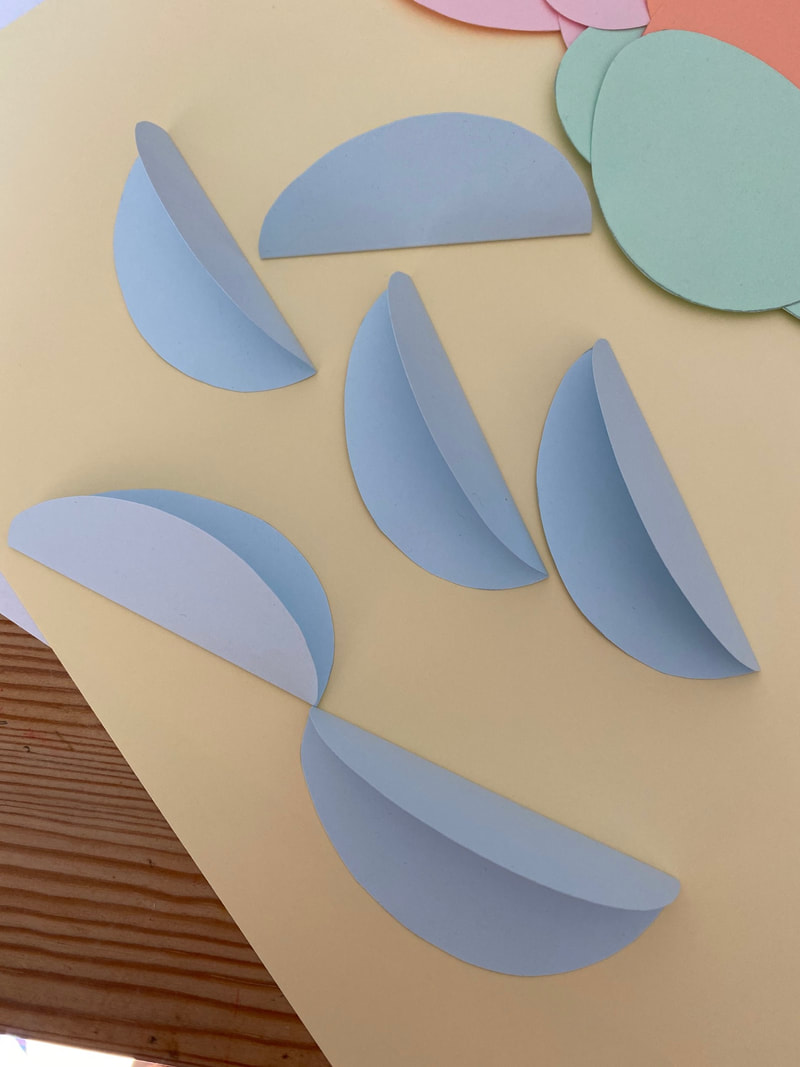
2. Fold the eggs in half lenthways. Put some glue on one side of the first piece, then stick another egg shape onto the glued surface. (Make sure it's the right way up!) Keep going until you've used all your egg shapes. Before you glue the last two sides together to complete the decoration, use a good amount of glue to stick a loop of the cotton thread into the centre, where all the folds join. I used some bakers twine for mine, but you could use string if you have some, or ribbon would make them even more colourful! Once you've done that, glue the last two sides together and you're all done.
Don't they look lovely?! I LOVE crafts like this- super simple but super effective. You can mix the colours up- I did one with a mix of lilac and green, and another with one of every colour arranged in 'rainbow order' which looks really cute! I also used some card as a backing for the paper eggs that the kids coloured in.
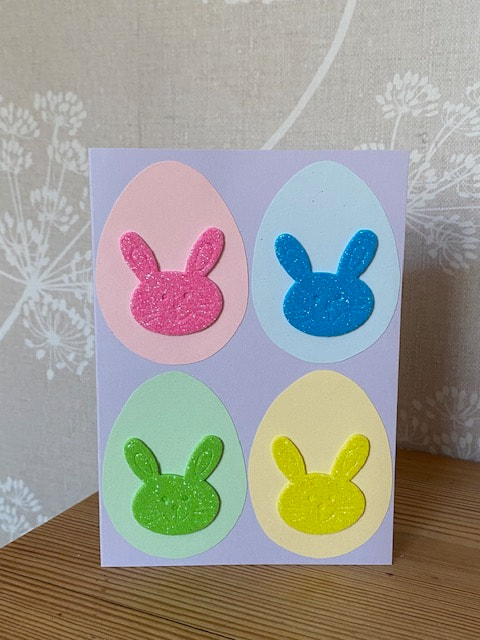
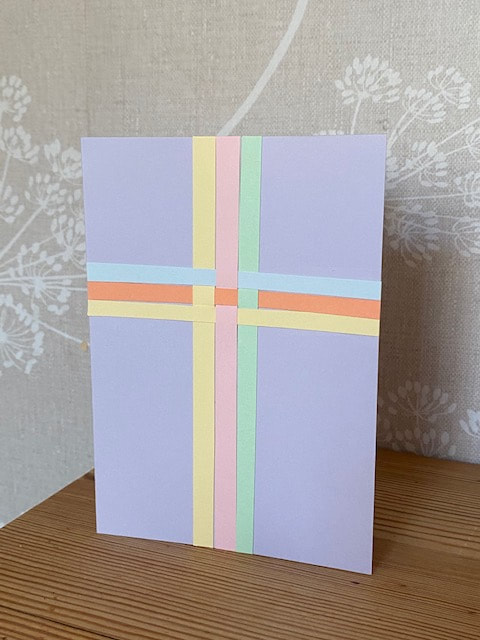
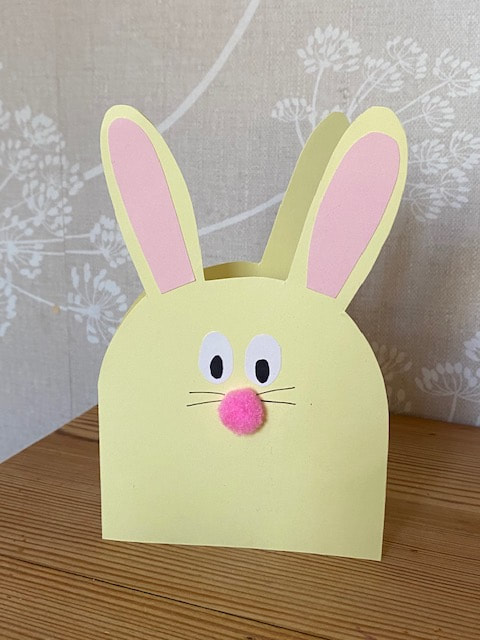
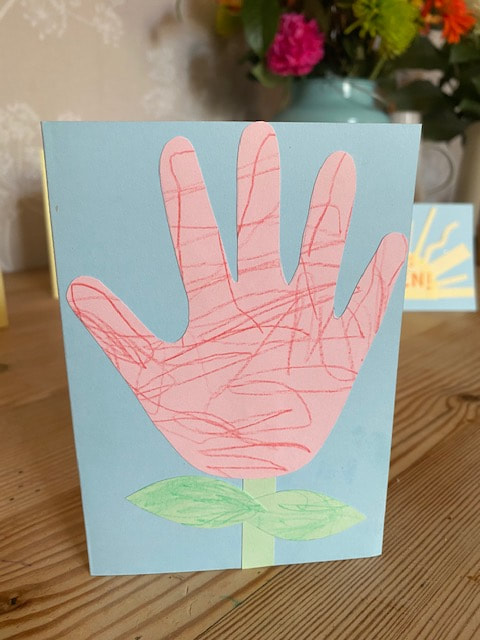
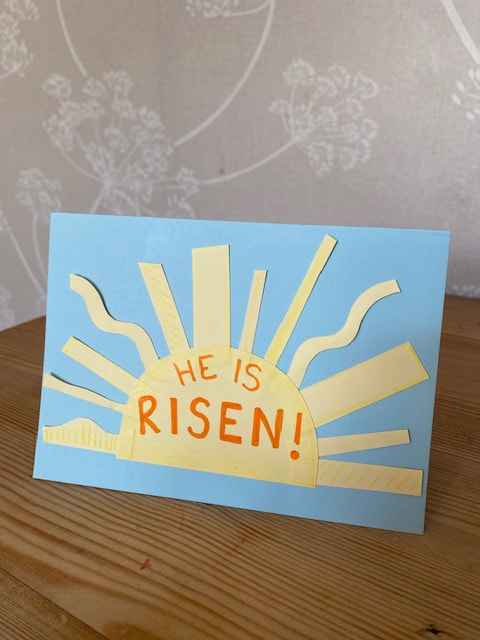
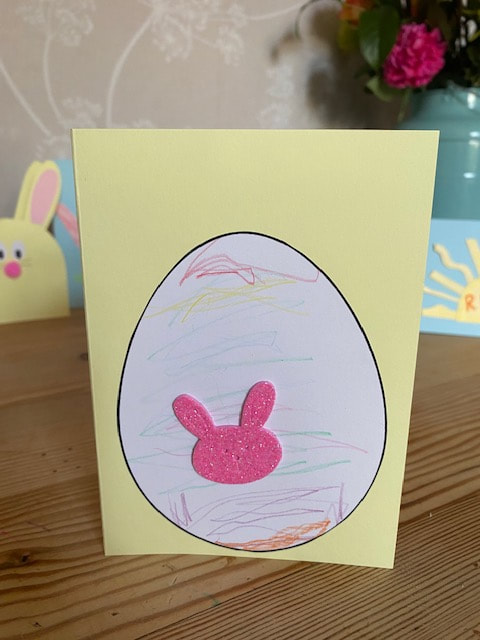
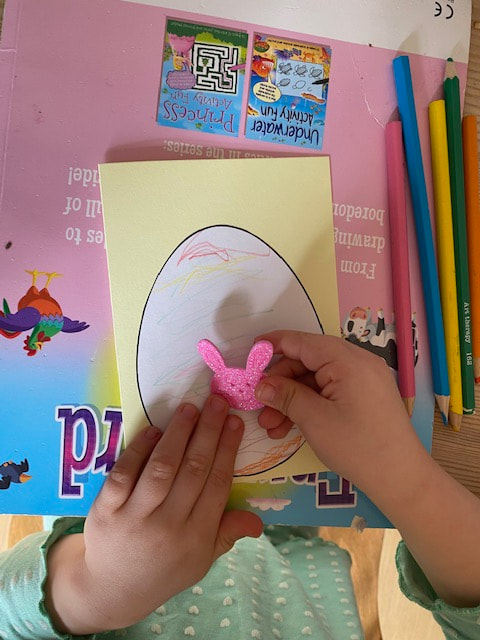
Hope you enjoy this one and that you all have a very Happy Easter. I don't know about you but I just love this time of year. Spring is just beginning and with it, comes a sense of renewed hope and looking forward. Easter is just around the corner and so I thought that for our first Safehaven Activity Pack, it would be really fun to celebrate by making some Easter cards! In your pack you will receive everything you need to make some gorgeous cards- I've tried to keep things relatively 'clean' so there's not too much clearing up to do afterwards, and everything you will need is in the pack, ready and waiting. At the end, you may well have some leftover coloured card and other bits and bobs. In the next blog post I'll show you how to use them to make some cute little Easter tree decorations. I hope you have a great time getting creative! If you take any photos, why not tag us in them- because, very excitingly, we now have an instagram account- @safehavencafeloughborough. I can't wait to see what you all make! 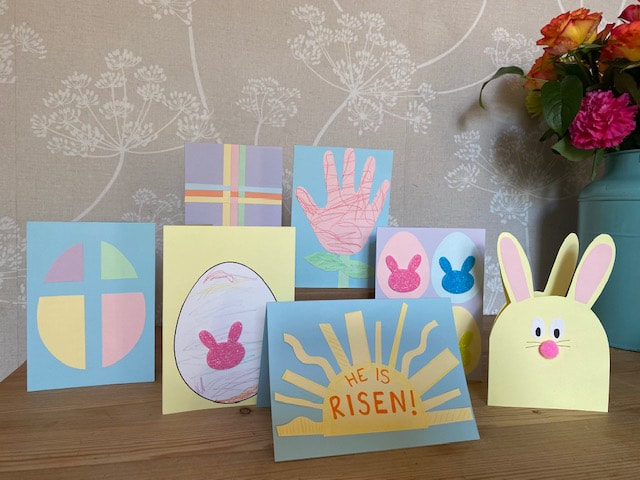 Sophia and I had a lovely time the other day making these examples to show you- some have a faith theme while some are more based on the Easter bunny! Whatever style you go for, I hope that they give you some inspiration and ideas for the cards that you make.
 And lastly, you could simply give your little one free reign to do whatever they want! Sophia coloured in the large template and stuck a bunny on it too. To be honest I'm surprised we didn't end up with all the stickers in the pack crammed on there! And of course she wrote a message inside. I often make a note of what she's saying as she writes, and then write a little 'translation' on the other side of the card for whoever is going to open it. One last option if you have a child who loves to colour things in, is just to use some of the patterned 'colouring in' eggs from the activity pack and stick them on the front. They would make a really bright and cheerful card!
We quite frequently end up with a crust or two that linger in the bread bag after the rest of the loaf has been eaten, and while I often just toast them for breakfast, sometimes I blitz them in the food processor to make breadcrumbs. They're handy to have around and you can use any bread you have- a bread roll that's started to dry out, the end of a baguette, wholemeal or white, all of it can be turned into breadcrumbs and stored in the freezer for when you need it. 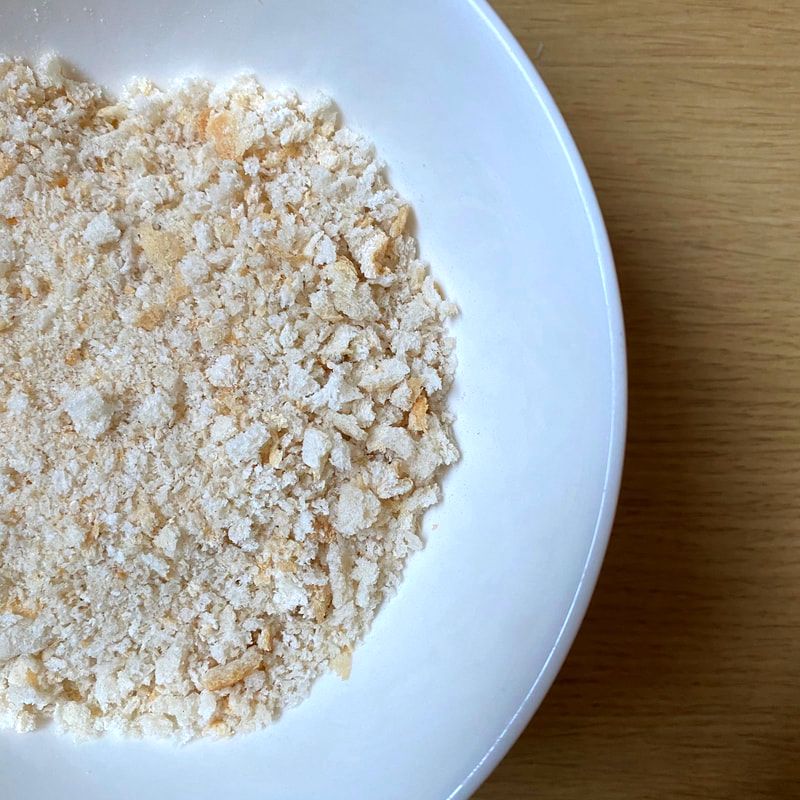 Here's my list of the best ways I've found to use them;
So this is a new one to me but I wanted to share it with you all because it sounds amazing! It's a fab way of getting everyone out of the house, even older kids who may not always jump at the chance to go on a family walk might be persuaded by this. However seeing as I haven't tried it yet, Ady who is part of Open Heaven is going to tell you all about it below, in our first 'Guest Post' on the blog!  One way to get children (of all ages!) out of the house is with a treasure hunt, and you might be surprised to know that there are millions of items called Geocaches, hidden all over the world (with hundreds of them in Charnwood) waiting for you to find them. These Geocaches are found in parks, urban areas, forests, deserts, on top of mountains — pretty much anywhere you can imagine. There are probably a few near you right now… All you need to do to take part is register for free at Geocaching.com and then armed with a smartphone and the geocaching app, you can start hunting. This is a picture of one I found in the Lake District, can you guess where the (very) small Geocache was hidden? 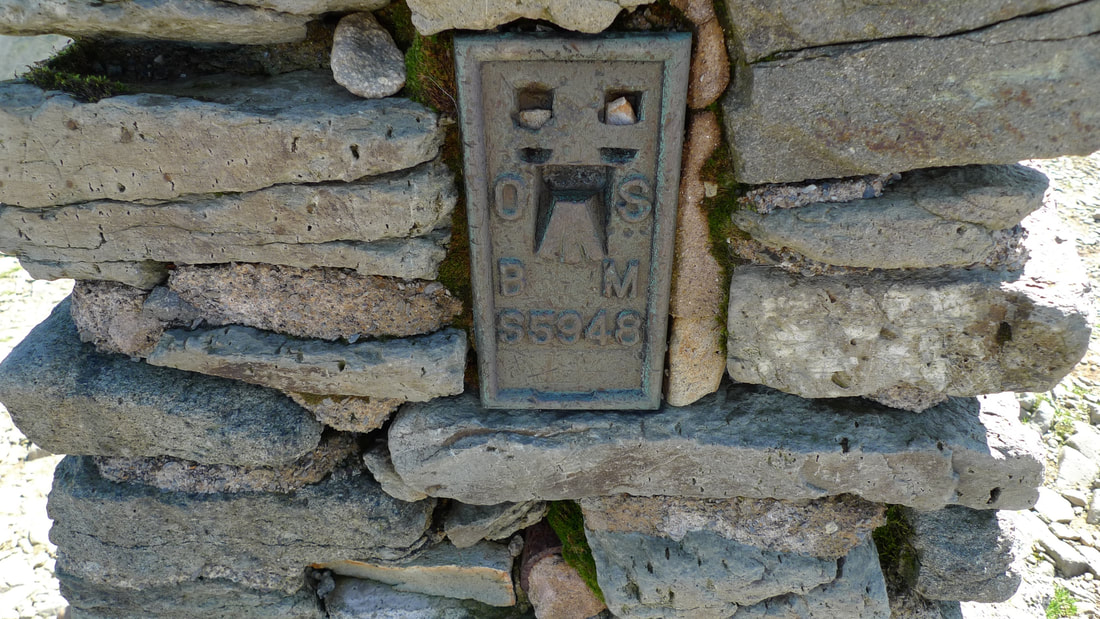 One essential item that you need to take with you is a pencil so that once you've found the Geocache, you can sign the logbook and then return the logbook and Geocache to their original location for the next person to find. In view of Covid 19 you may also want to take some hand sanitiser with you, just to be on the safe side.  I have found Geocaching to be not only a great excuse to get out of the house for a walk, but also a great way to discover more of the countryside around where I live. Doesn't this sound so fun?! I've signed up already and there are loads of geocaches hidden within a stones throw of our house- I've probably walked past lots of them without knowing that they're there! Definitely some good half term fun to be had with this.
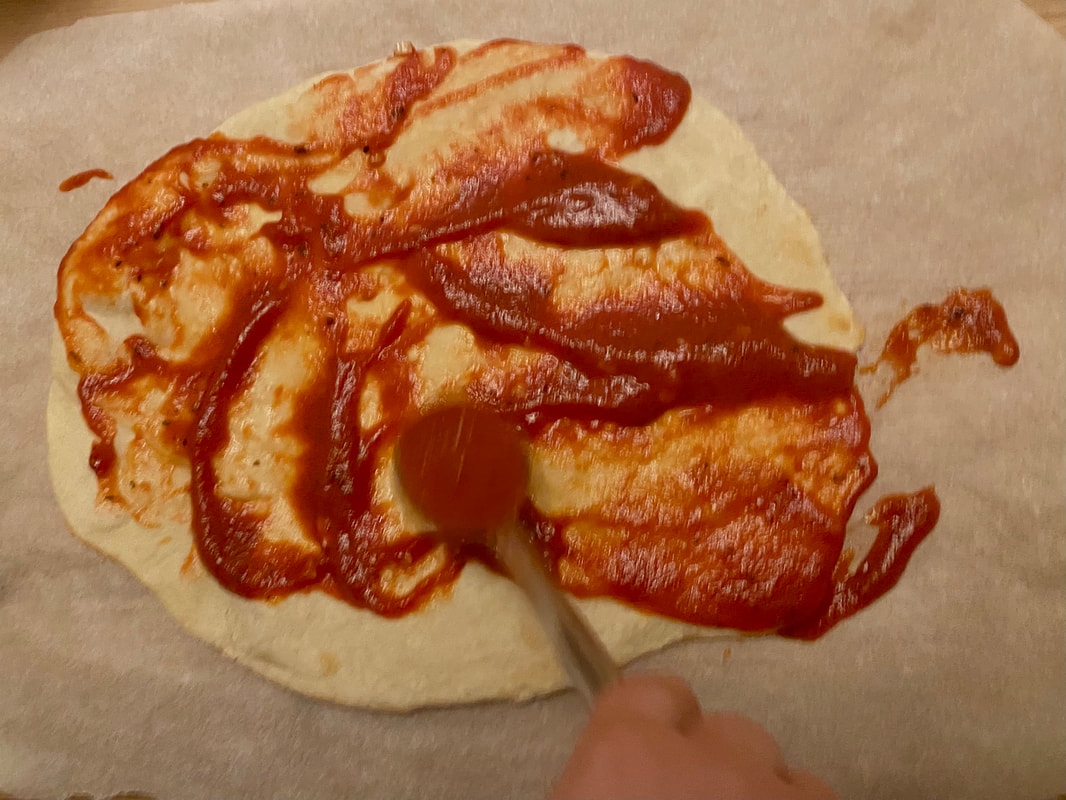
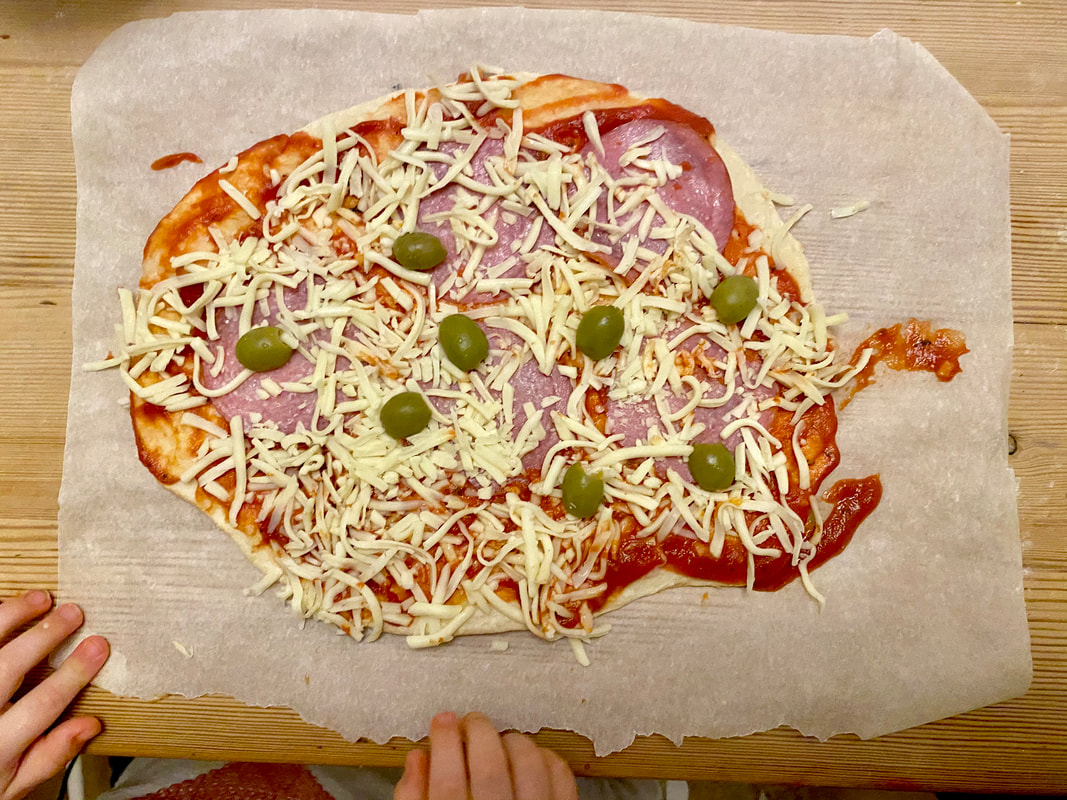
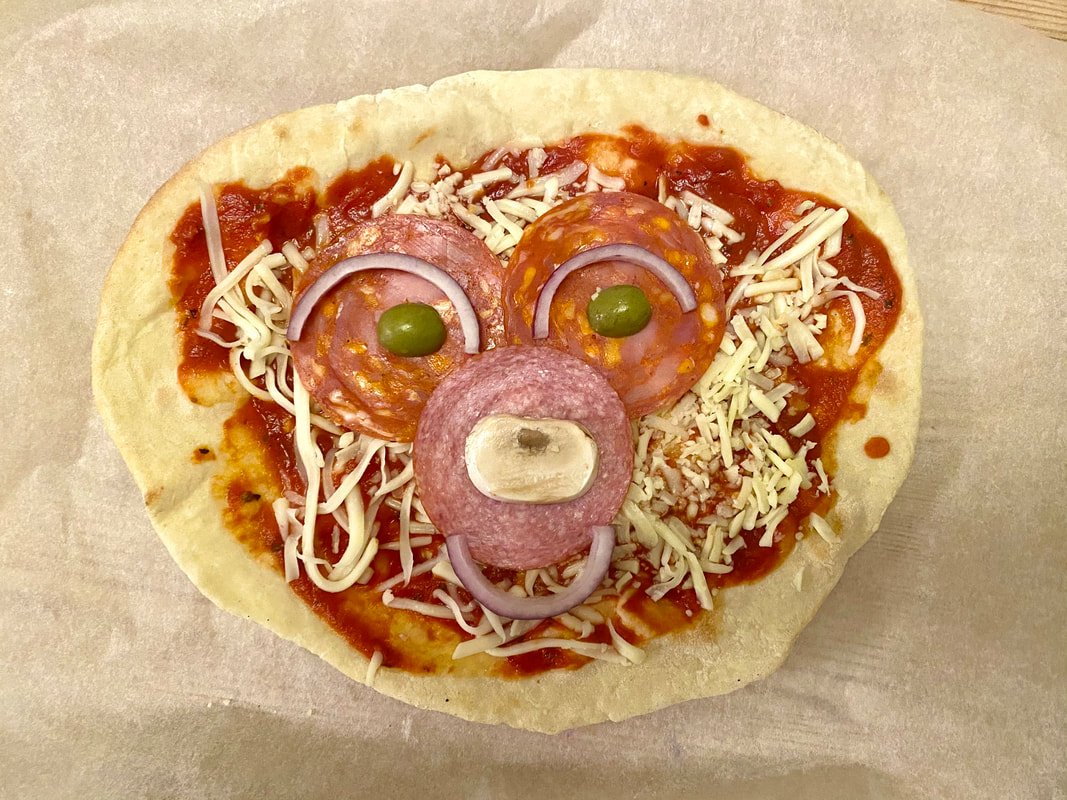
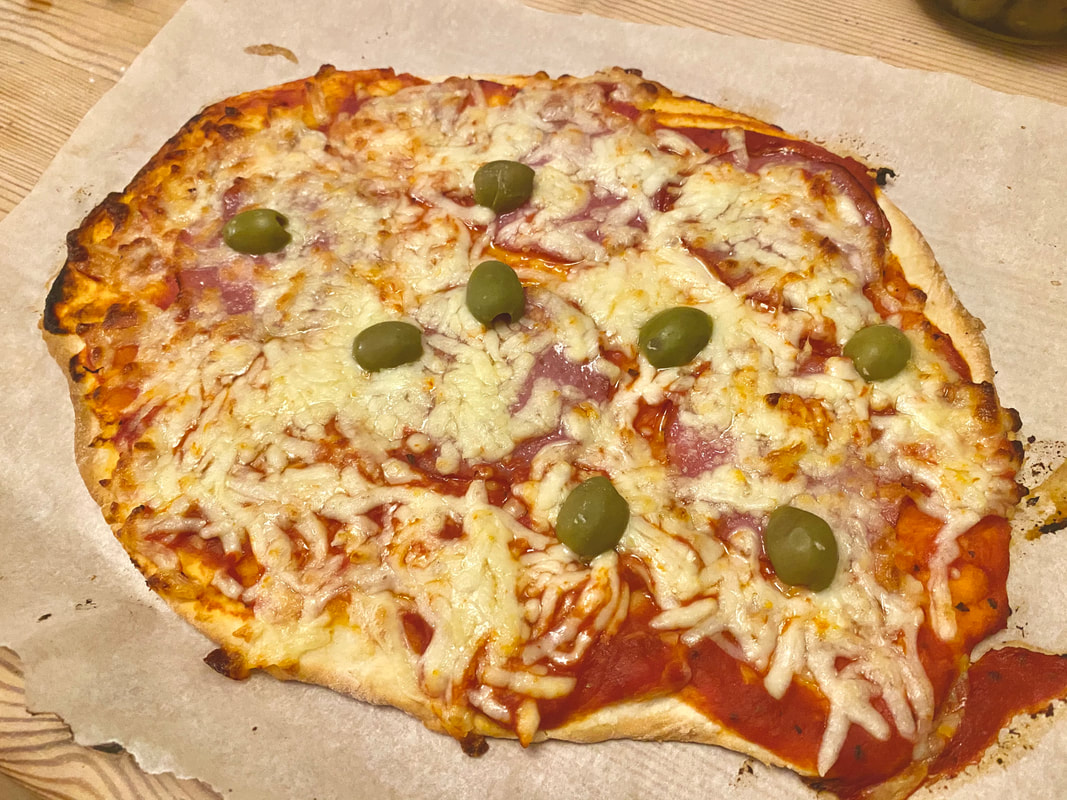
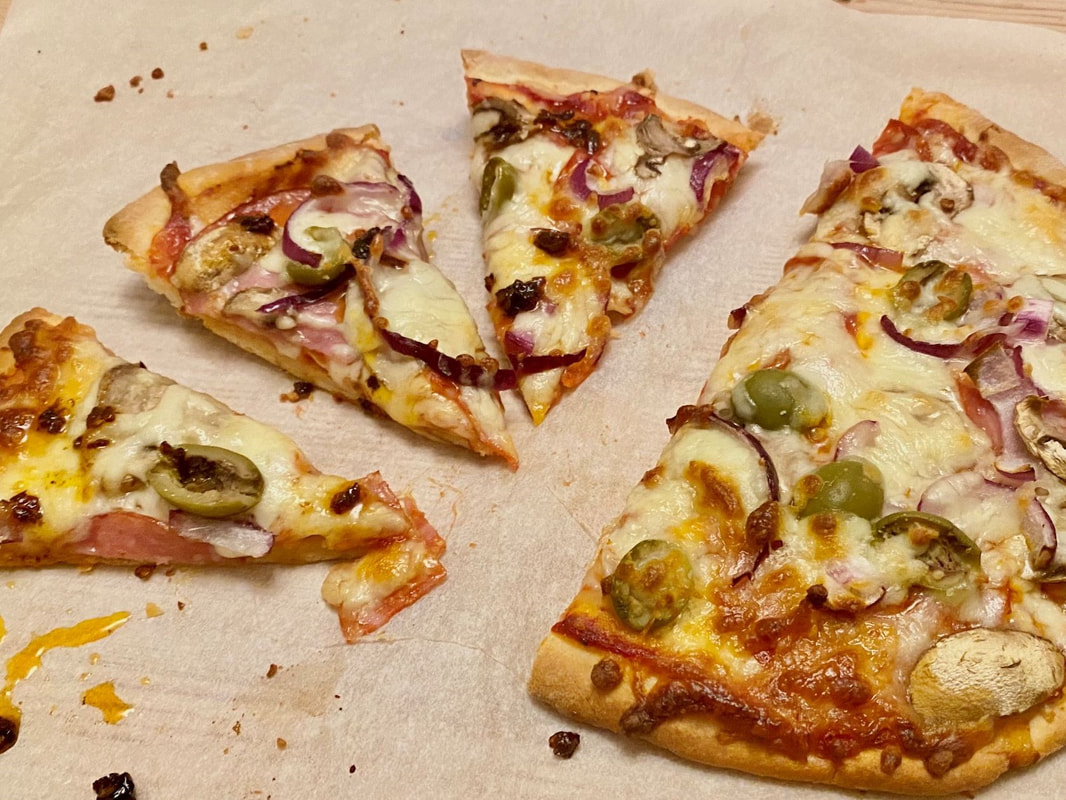
As a family we love having a pizza night! Miles and Sophia love helping to cook, and with this everything can be done at the table rather than in the kitchen which is ideal- there's much more space, especially for rolling the dough and nobody has to stand on chairs to reach the worktop. This is also learning at it's best- when the kids don't realise it's happening! They're actually recognising numbers, learning how to weigh accurately, developing their fine and gross motor skills and hand-eye coordination... the list goes on! Plus, getting creative with food and involving children in making it can encourage fussy eaters to try new things, along with a whole host of other benefits. I usually plan this for a weekend when we have a bit more time on our hands, so we don't need to rush and the kids can enjoy the making as well as the eating. The dough recipe itself is from BBC Good Food and is a simple mix of flour, natural yogurt, baking powder and salt. We make our own pizza sauce without the added sugar- I'll pop the recipe along with the dough recipe at the end of this post. When it comes to the toppings, the possibilities are endless! I normally put lots of options in the middle of the table and the kids just choose what they fancy. Today I put out Salami, chorizo, green olives, mushrooms and red onion along with the tomato sauce and grated mozzarella. You could try different cheeses, tomato, pepperoni, ham, chicken, anchovies, pepper, sweetcorn- anything you like the sound of. Pizza Sauce Recipe Ingredients: tsp oil 2 cloves garlic, finely chopped 1 carton passatta heaped tsp oregano and heaped tsp basil or 2tsps mixed herbs Optional: 1/2 tsp celery salt 1/2 tsp onion salt pinch pepper Method:
Dough Recipe Equipment: rolling pin baking parchment Ingredients: 300g /10.5oz Self Raising Flour (plus a bit extra for dusting) 300g / 10.5oz Natural Yogurt 1tsp Baking powder 1/2tsp Salt Method: Put two baking trays in the oven and allow to preheat to 220C or 200C fan.
TOP TIP
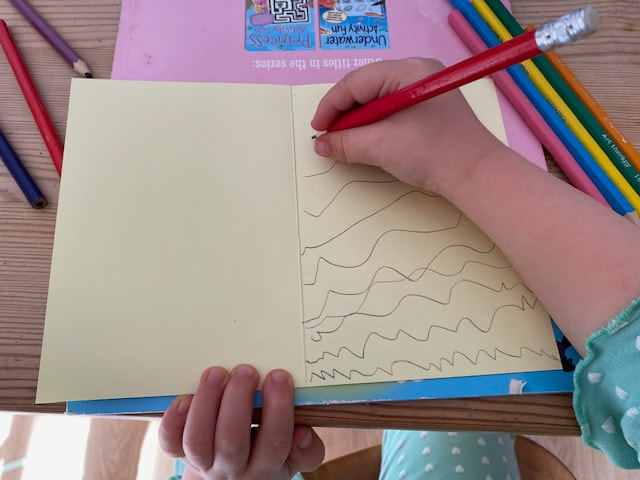
I always double the quantities when I make the dough. Just freeze individual portions wrapped in cling film, and defrost them next time you want to make pizza. You'll be half way there before you've even lifted a finger. Link to BBC Good Food recipe: Recipe:www.bbc.co.uk/food/recipes/quick_cheats_pizza_88026 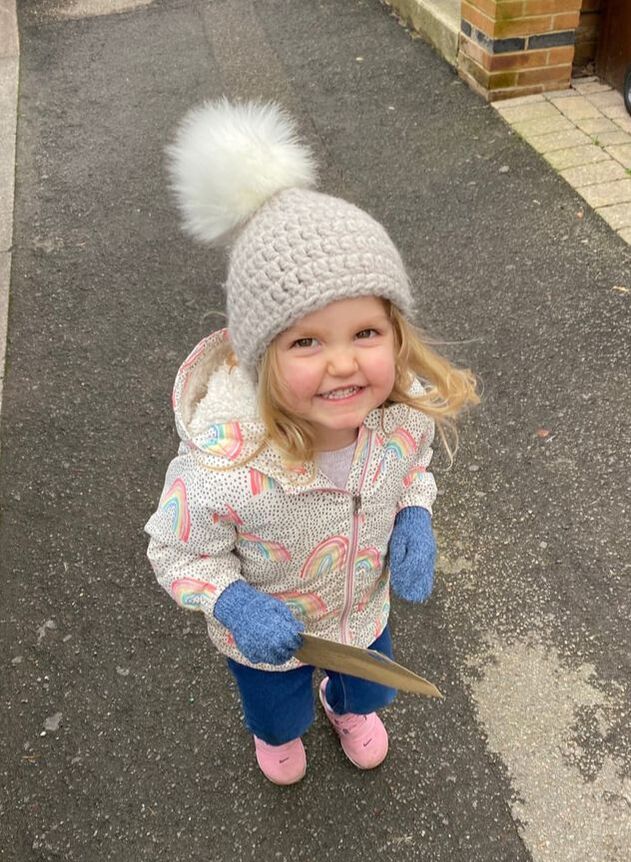 Something that Sophia loves to do is go for a walk to post a letter! We do it quite often these days. She will happily sit down with some paper and pencil crayons or felt tips, and draw a picture for someone we know- usually her grandparents or aunts/uncles etc. Now this doesn't exactly take very long- I'm not going to be able to do a sink full of washing up while she does it, but I might manage a small task or sit with a cuppa for five minutes and watch while she creates. To be honest, I normally go for the latter- there's really no contest. It is pure joy to see her in her own little imaginary world, talking to herself as she draws, or acting out the voices of the people who she's drawing. For a longer activity, but one that requires some supervision- you could get the paints or craft stuff out too. But I like that this is quite fast and feels achievable, and doesn't need lots of cleaning up afterwards. When she's completed her artwork, we pop it in an envelope, she 'writes' the address, and then I write the address too so it goes where it's supposed to! She LOVES sticking the stamp in the corner of the envelope, and eagerly grabs her coat so we can post it. She proudly carries it as we walk round to the post box, and is now tall enough to post it herself which she hugely enjoys being able to do. If you like, to make this totally free, you could pop it through the recipient's letterbox by hand if they live close-by, the excitement of posting it will be just the same! 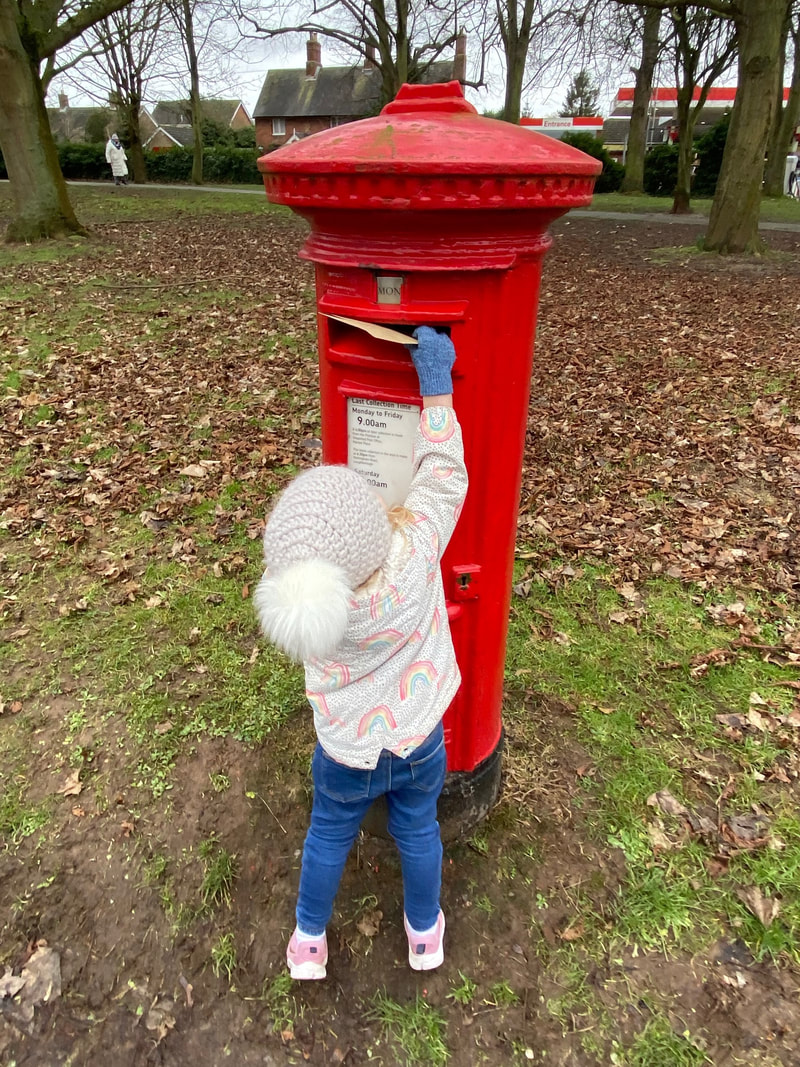 This is such a fun activity- although not one for a rainy day if your little one likes to carry the letter themselves, which they probably will! If it's more than a 30 second walk to the post box, their precious letter will probably get rather soggy. But it's a great opportunity for the kids to be creative, practice their mark making and drawing skills and burn off some energy. For us parents, it's practically free which is always good, gets us in the fresh air which is a big mood-booster, and gives us all the fuzzies, knowing what a lovely surprise it will be for the person who receives it!
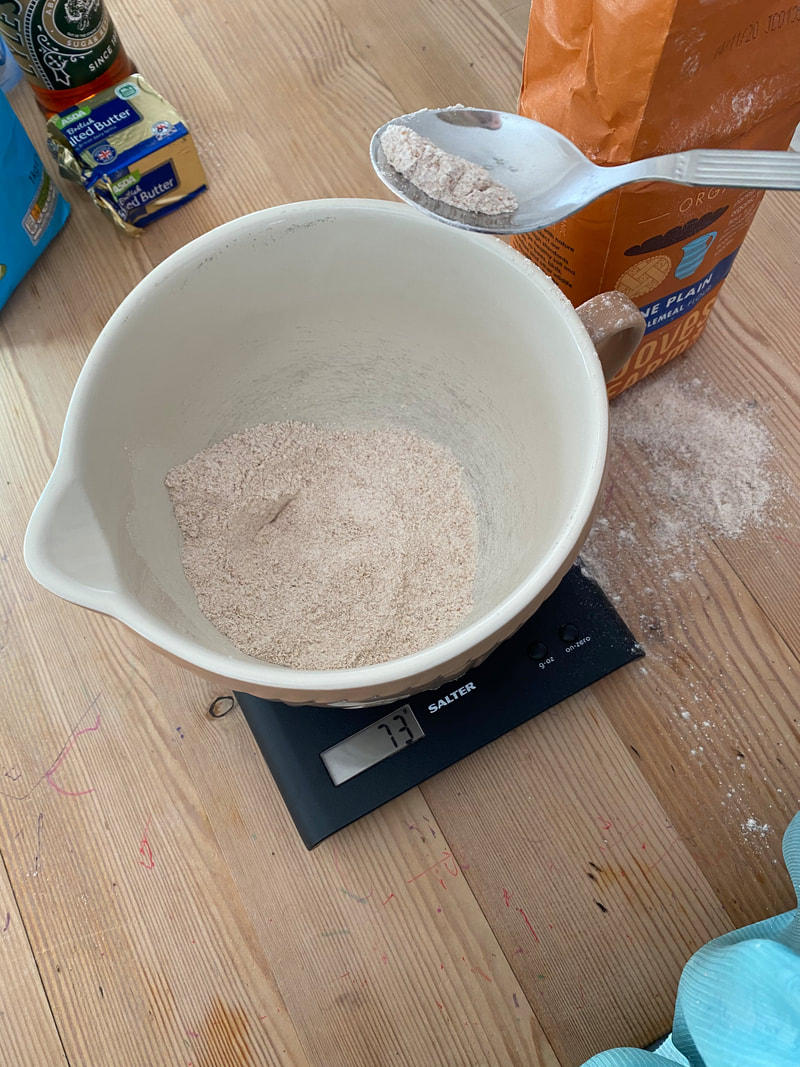
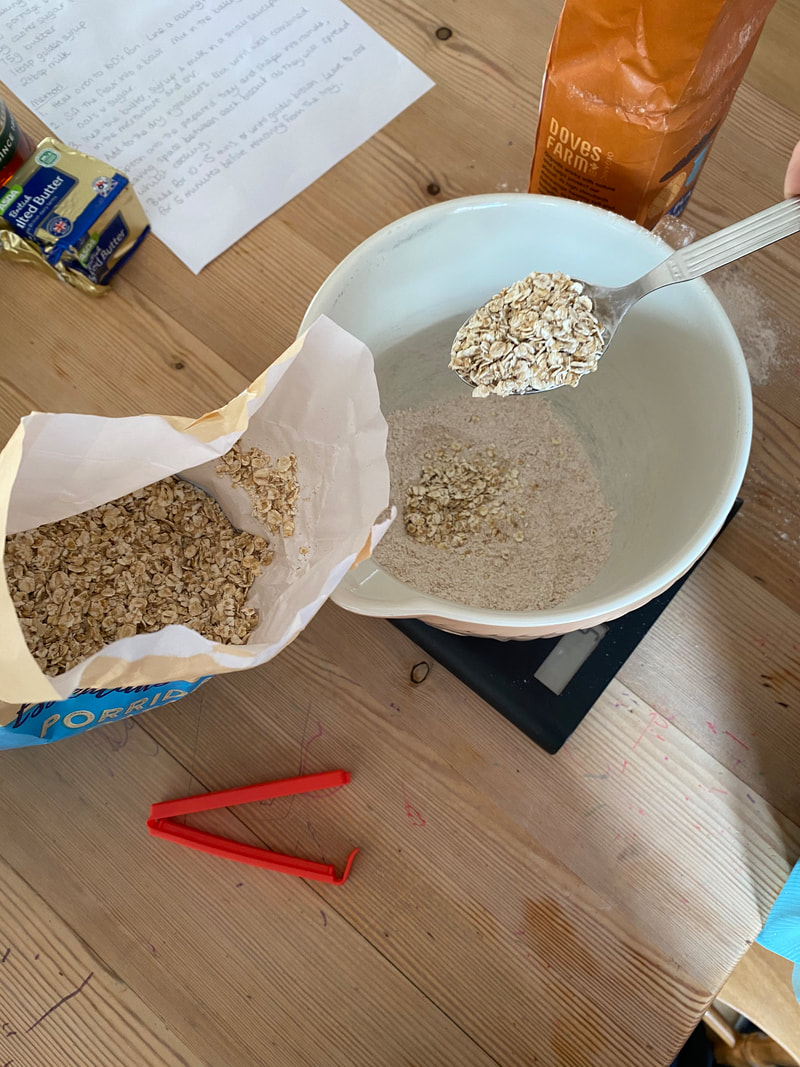
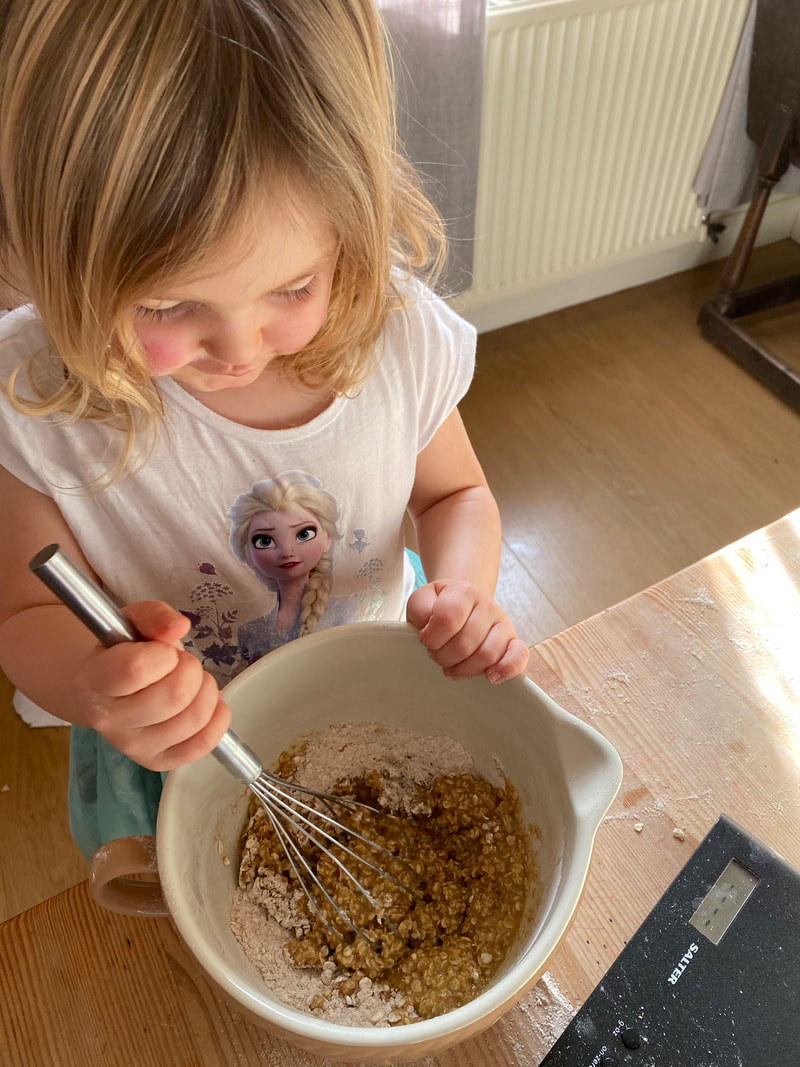
This is a really quick and simple biscuit recipe (BBC Good Food) that Sophia loved helping to make. It's pretty healthy as biscuits go because it uses wholemeal flour along with the oats and doesn't have huge amounts of sugar in it. Perfect for every day sort of biscuits and half term baking. If you don't have wholemeal flour, I'm sure plain flour would work just as well- let me know if you try it! Ingredients 75g wholemeal flour 1 tsp baking powder 75g porridge oats 50g caster sugar 75g butter 1 tbsp golden syrup 2 tbsp milk METHOD
BONUS ACTIVITY!
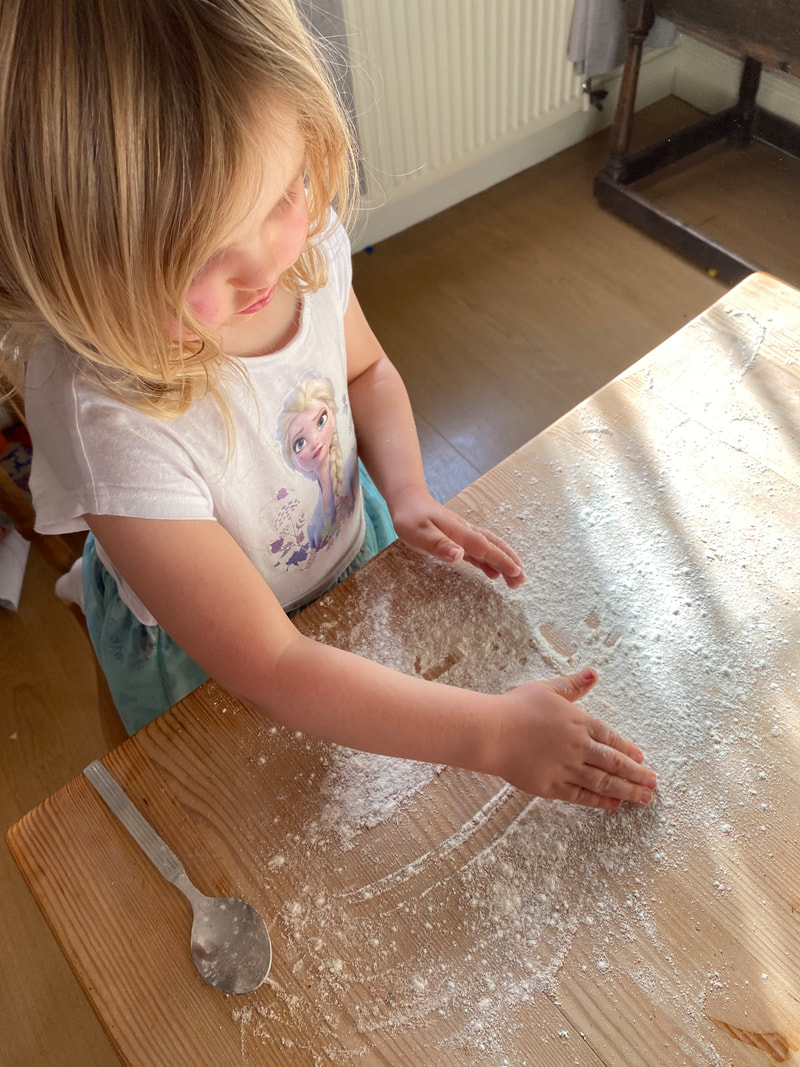
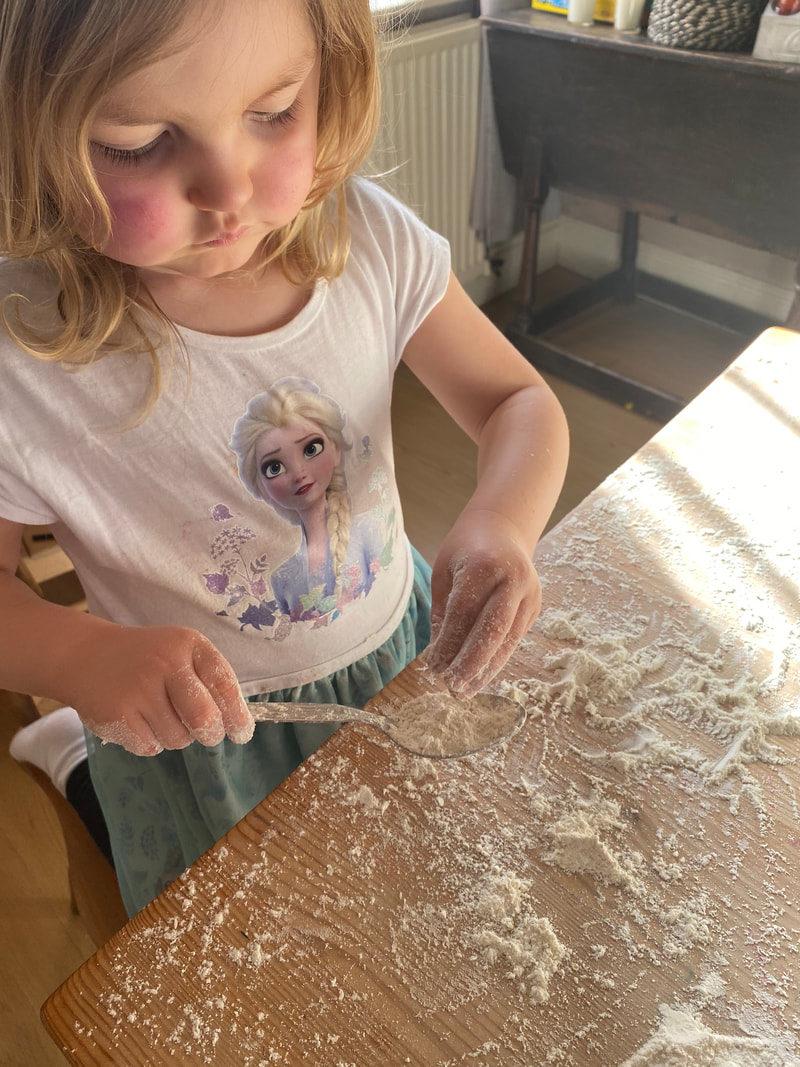
There was some flour on the table that Sophia started to play with as I was clearing up. She was pretending that it was snow and was having so much fun that I took some extra out of the bag and sprinkled it on the table for her to play with. With just the spoon that we'd been using and her imagination, this kept her busy for over 25 minutes while two batches of biscuits cooked in the oven! I think her face shows just how much she enjoyed it! Link to BBC Good Food Recipe: www.bbcgoodfood.com/recipes/oat-biscuits-0 In my last blog post, I spoke about all the reasons why I write a meal plan each week. In this post I'm going to give you all the tips and tricks I've learnt along the way about how to meal plan really well! 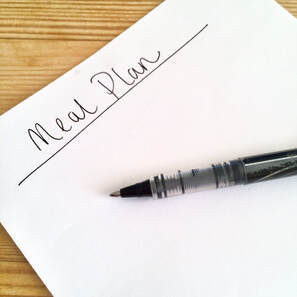 1. Don't write a meal plan when you're hungry! Maybe a slightly silly sounding one to begin with, but I find if I'm starving hungry when I sit down to write the meal plan, I end up planning meals that are unhealthier than I would normally choose. Just like going shopping, it's easier to make good choices when your brain isn't being swayed by the needs of your stomach. I like to sit down when I've got half an hour spare, grab a cuppa (when does a cuppa not help things along?!) and get to work. 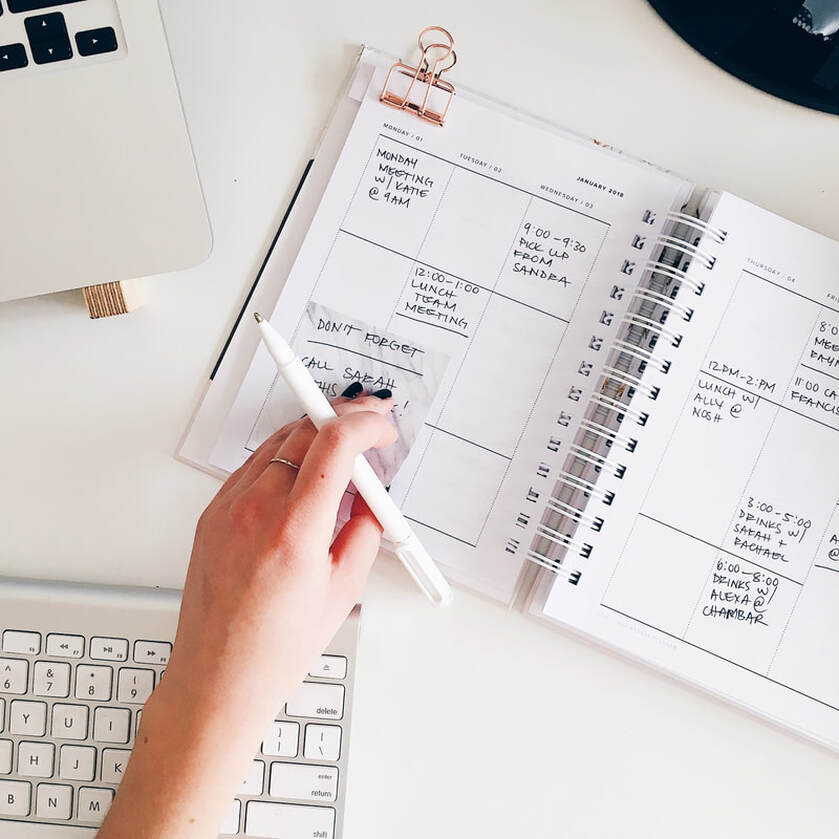 2. Check your calendar Have a quick look over your calendar for the week and see if there's anything that might affect your food choices for your evening meals. Now at the moment, in these weird covid times, for the most part we don't have much going on in the evenings or after school, if the kids are even in school at all! But when life starts to return to normal again, on a Wednesday after school Miles will have a swimming lesson. I know that by the time we get home he'll be hungry after all that exercise, and dinner needs to be on the table fairly quickly. So for that night I might plan a quick pasta dinner or a batch cooked meal from the freezer. 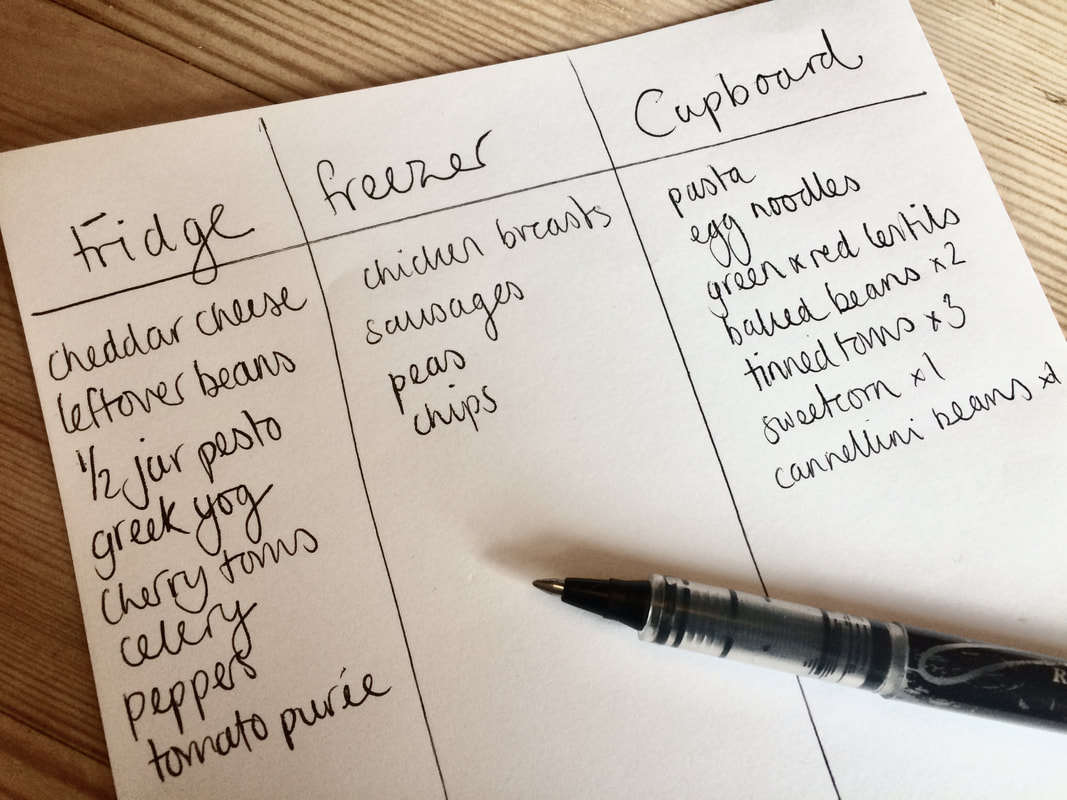 3. Make a list of what you've got Have a proper look in your cupboards/fridge/freezer and write down what you've got that you can use to make meals out of. Sometimes just seeing it all written down gives you instant ideas for meals that you can make without even going shopping! Or at the very least, ideas for meals that you can make without needing to buy a huge amount. 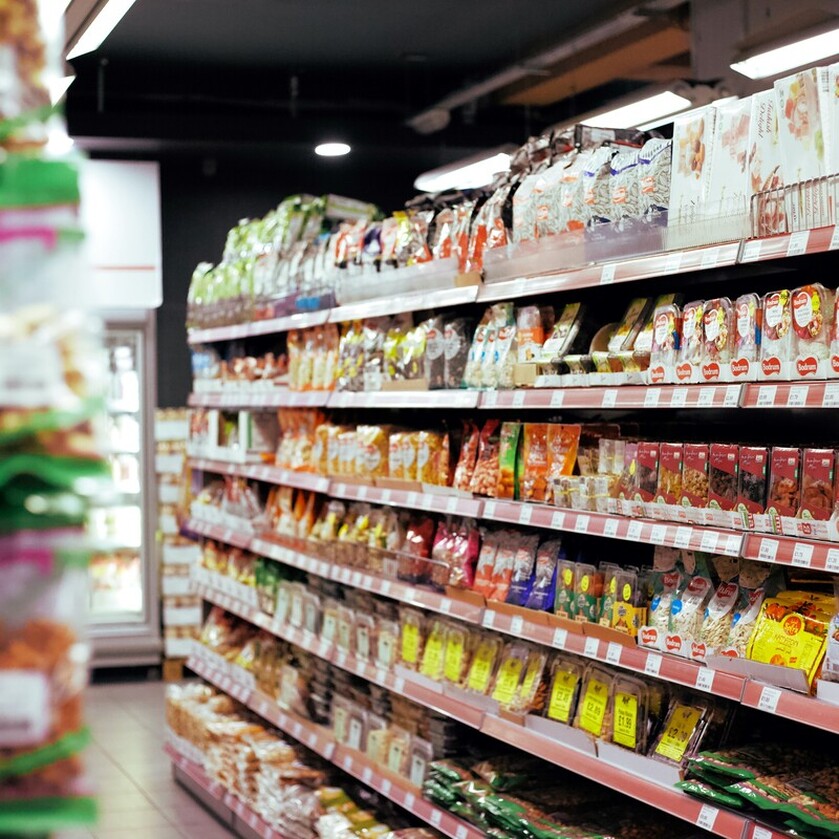 4. Make the most of supermarket offers Have a look at the offers that are on in the supermarket that you use the most. We go to Aldi for nearly all of our shopping- so I check out the super 6 offers before I go and try to use some of those items in the meal plan for the week. It can really help to keep the cost of fruit and veg down. You could also do the same for the offers on meat too, but usually the more 'basic' (versatile!) meats that I buy- mince, whole chickens etc aren't the ones that are included in the offers. With other supermarkets there may be all kinds of offers that you can make the most of if you plan your meals around them! 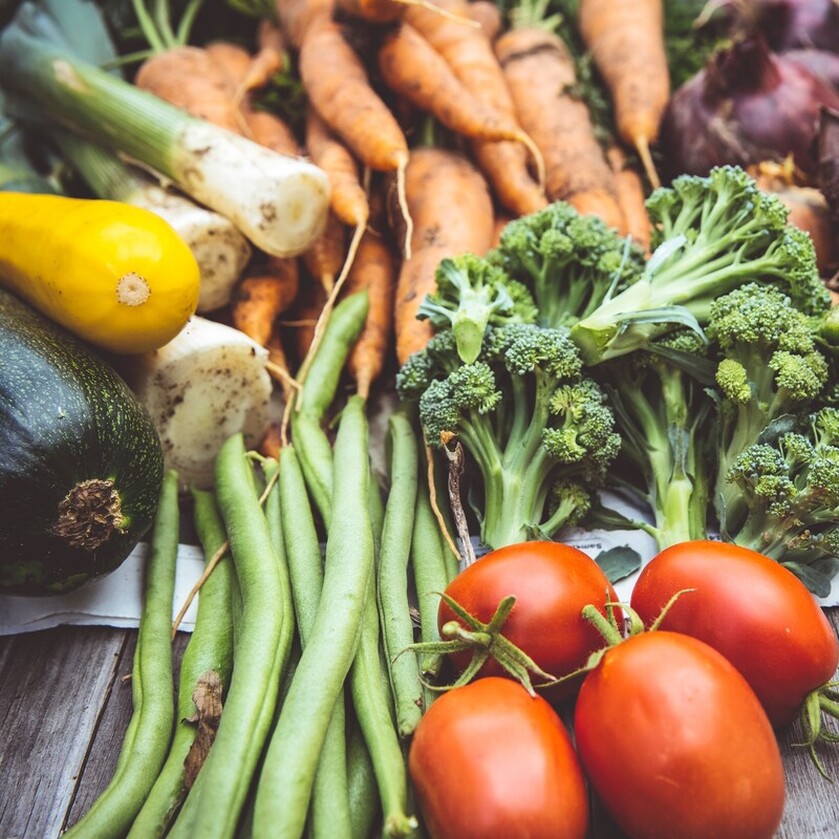 5. Plan in some veggie meals Veggie meals can be much cheaper to make than meals containing meat, as well as being good for our health and for the environment too! Try using lentils or soya mince in a cottage pie instead of minced beef, or how about simply subbing the chicken for chickpeas and extra onions in a good curry? There are so many amazing blogs dedicated to veggie food out there with heaps of exciting ideas! A couple of good ones that I've found and used before are tinnedtomatoes.com and www.happyveggiekitchen.com. 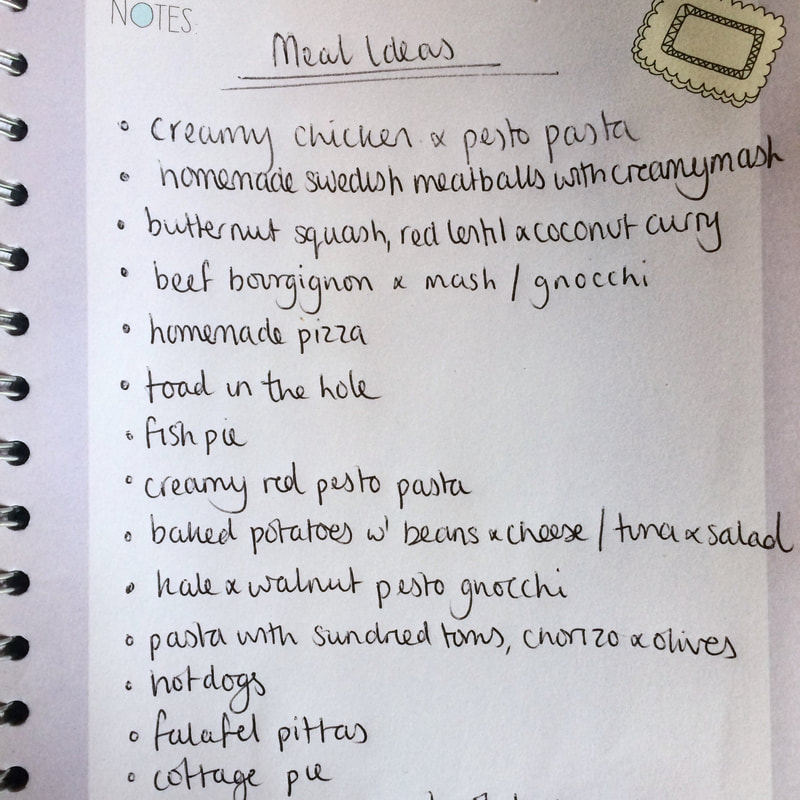 6. Keep a list of regular meals Have a list of all the meals that you eat on a regular basis written down somewhere, and add to it if you cook something new that turns out to be a favourite! Mine is in the back of my recipe book, and that's where I also keep print-outs of recipes that I want to try, or recipes that I've pulled out of free supermarket magazines. It makes planning so easy, because all I need to do is look down the list and choose the meals. 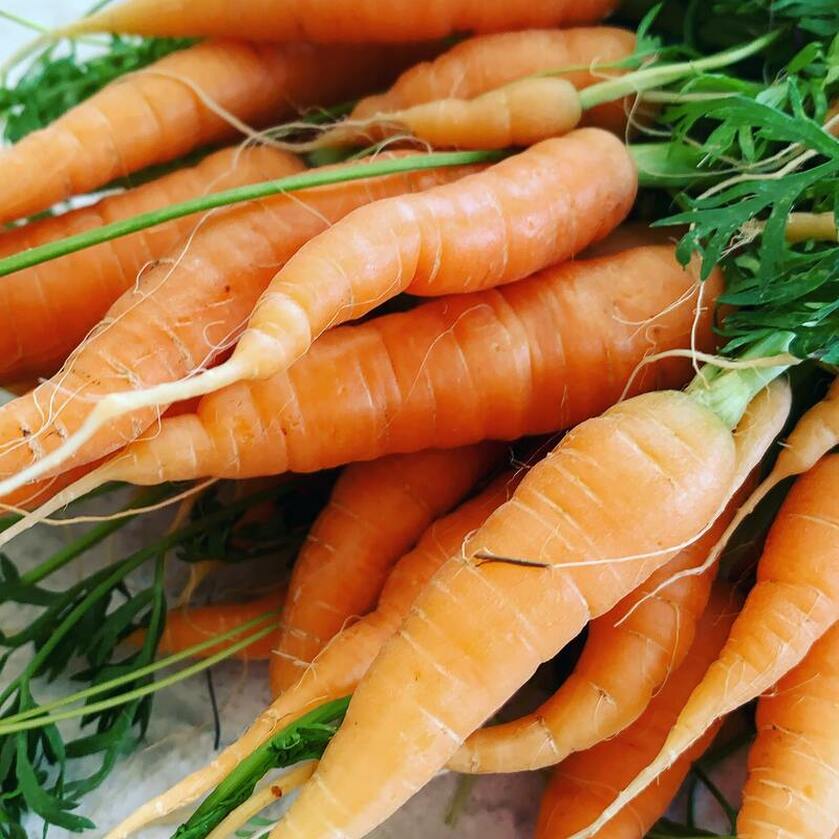 7. Bulk is best Buying in bulk or larger packs where posssible, and using that thing in more meals throughout the week is a good way to keep costs down- if you can stretch to buying a large or extra large chicken instead of a small or medium one, you can plan to use the leftover meat in more meals over the following few days. Likewise, a large sack of potatoes or a big pack of carrots is more cost effective than smaller packs- so as long as you have somewhere to store them, these can also be good options. 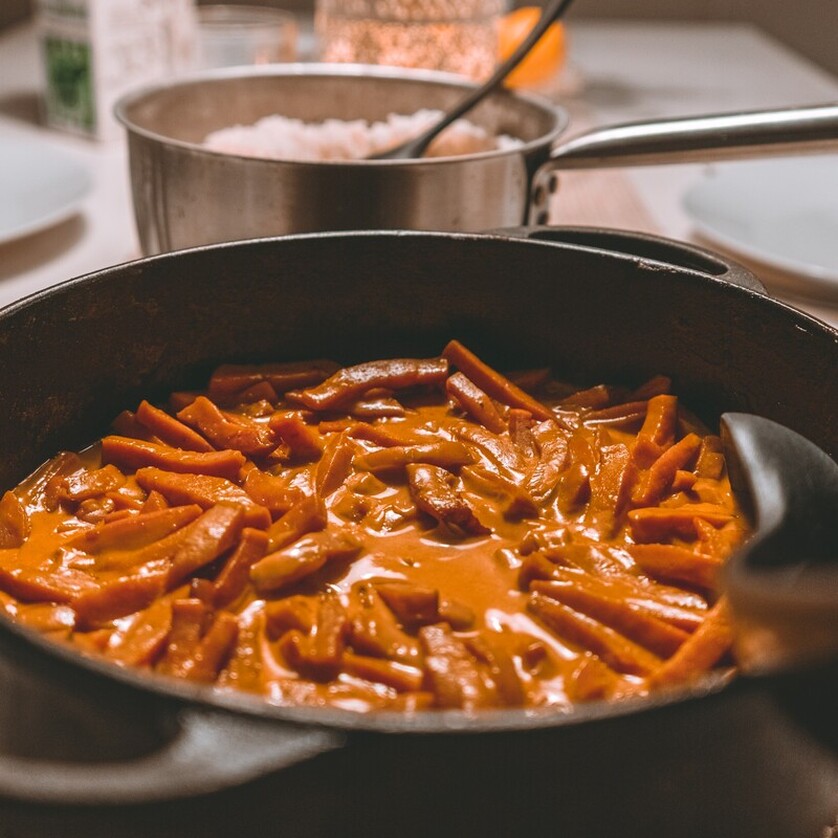 8. Batch cooking for the win! Plan in one or more days where you batch cook something. The more you get stashed away in the freezer, the more flexibility you have over your meals for the week. If plans change and you need something speedy, they're there. If you've been up for most of the night before with a baby or toddler who won't sleep, they're there! It's nice to know that you have a backup ready and waiting and it also means that you can have a night off cooking sometimes too!  9. Newy Newness! Before I started meal planning, I'd see a recipe somewhere, think how amazing it looked, then look at the list of ingredients only to realise that I didn't have half of them. I'd plan to buy the unusual ingredient the next time I went shopping. However the reality was, that the next time I was at the supermarket I was so overwhelmed with just trying to make sure I'd got enough stuff to make meals out of, that the special ingredient would get forgotten about. These days we eat lots more new meals because I can plan them in and make sure I have what I need to make them with. For a while I tried to make one new thing every week- this probably only lasted for a month or two but it was a fun challenge!  10. Go easy on yourself
Finally, don't pile pressure on yourself trying to do all of these things every time you make a meal plan. This is supposed to be something that will remove some of the stress from your life! Some days you'll have lots of time and motivation to check out offers, look at new recipes and be super thoughtful about it all, and other weeks it will be all you can manage to use the same meal plan as the week before, scribble the shopping list down and hope for the best. That's just how life goes, right? I'm sure we've all been there. But I hope this has given you some food for thought and some pointers for when you write your own meal plan. Let me know if you decide to give it a go! |
AuthorHi, I'm Laura. I'm part of Open Heaven Church in Loughborough and I run our Safehaven Cafe courses along with our amazing team of volunteers. Categories
All
Archives |


 RSS Feed
